
Long Beach Sensor Wire Repair Guide
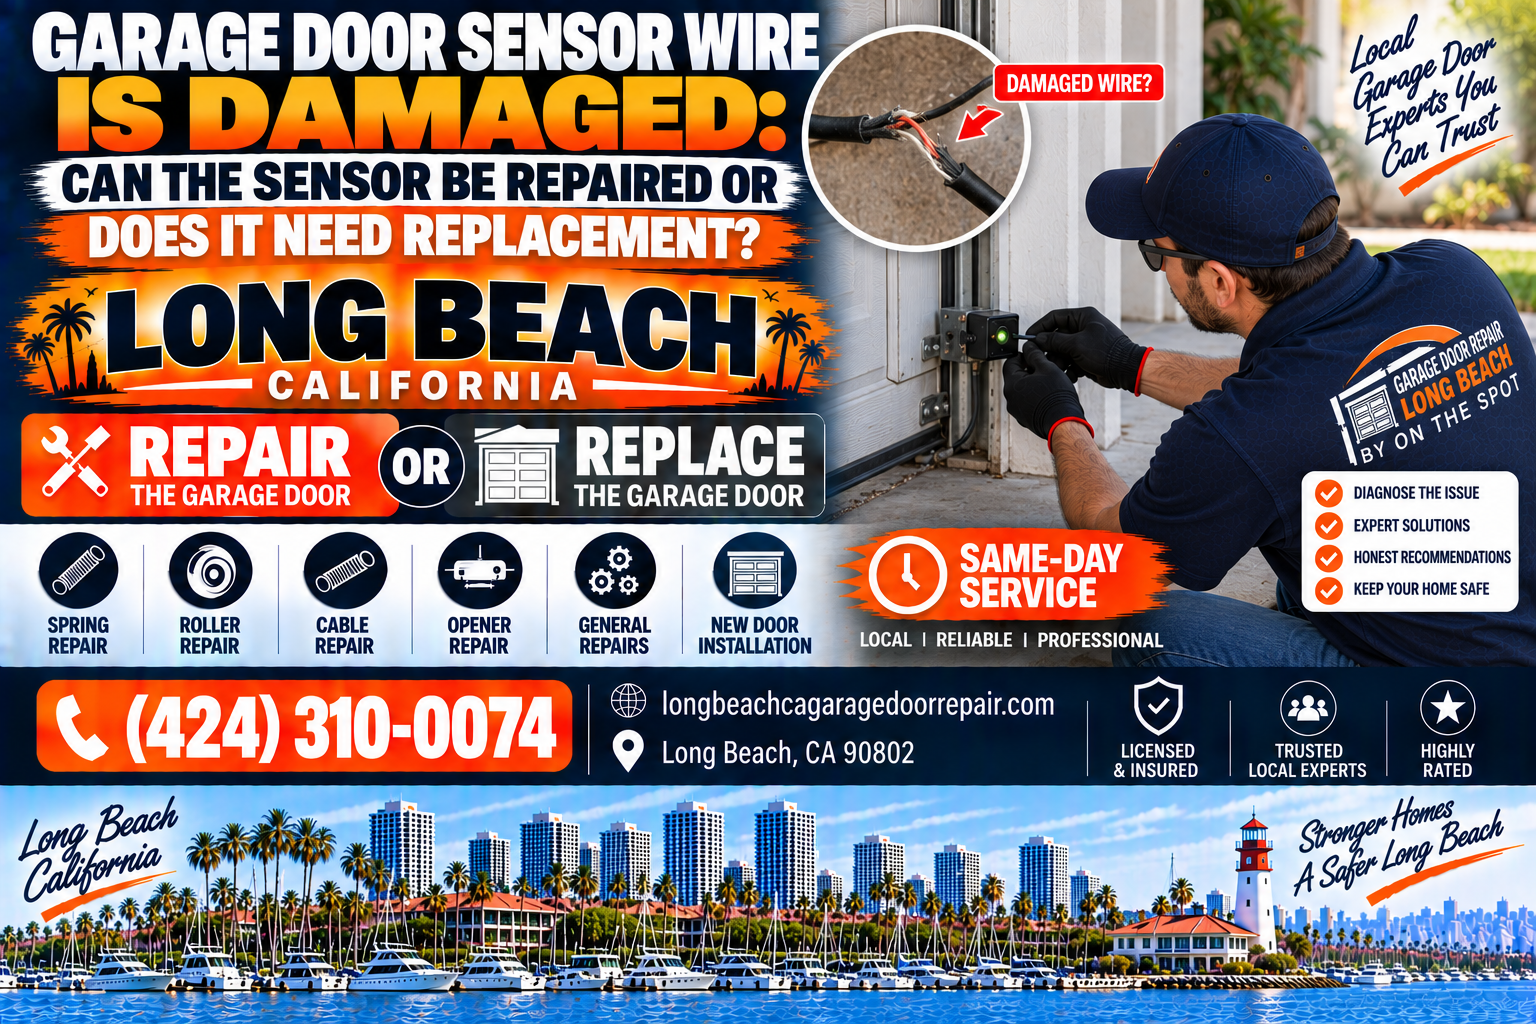
Garage Door Sensor Wire Is Damaged: Can the Sensor Be Repaired or Does It Need Replacement?
When a garage door sensor wire is damaged by pet chew, pinch, or track-edge abrasion, intermittent close failures follow. Learn when a proper splice works, when full wire or sensor replacement is wiser, how to spot damaged loom, and why you must never bypass photo-eyes.
Garage Door Repair Long Beach By On The Spot helps homeowners, renters, landlords, property managers, HOA communities, and small businesses restore safe sensor wiring with coastal-aware service across Long Beach, CA.
Chew + Pinch + Abrasion
Splice vs Replace
Never Bypass Photo-Eyes
CPSC + DASMA + SCE
Serving Long Beach, CA
Table of Contents
Direct Answer: Can a Damaged Garage Door Sensor Wire Be Repaired or Does It Need Replacement?
Direct answer: A damaged garage door sensor wire can sometimes be repaired with a proper low-voltage splice and re-routing when the break is clean, the conductors are otherwise healthy, and the photo-eye heads still power and align correctly—but chewed, crushed, abraded, or multi-point failed runs often need full wire replacement, and cracked or electrically intermittent sensors need full sensor (or sensor-plus-wire) replacement. Never “repair” a close problem by bypassing safety eyes. Intermittent closes that change when you flex the cable usually point to wire damage, not a dirty lens alone.
Safe homeowner steps include photographing chewed or pinched sections, noting which LED goes dark when the wire is gently moved (without yanking), clearing pets and storage from the loom path, and calling a pro before cutting or splicing if you are unsure about polarity, opener terminals, or power state. Stop short of taping over lenses, shorting terminals, installing jumpers, or leaving sensors unplugged so the door will close.
Garage Door Repair Long Beach By On The Spot diagnoses damaged sensor wire—chew, pinch, abrasion, loom wear at track edges—then decides splice versus full sensor or wire replacement while keeping photo-eye protection fully active. Call (424) 310-0074.
What “Garage Door Sensor Wire Is Damaged” Means in Real Garages
When a garage door sensor wire is damaged, households usually notice that the door will not close reliably, one photo-eye LED flickers or goes dark, or closing works only after someone “wiggles the wire” or holds a cable away from the track. The plastic eye may look fine. The failure lives in the thin low-voltage pair that carries power and signal between the opener head and the near-floor sensors.
Damage is not one story. Pet chew marks leave tooth crescents and copper strands showing. Pinch damage appears where a hinge, roller path, storage rack, or staple crushed the jacket. Abrasion shows as shiny rubbed spots where the loom kissed a track edge for months. Salt-brittled jackets in coastal Long Beach crack and then nick under vibration. Each pattern can produce the same symptom: intermittent close failures that feel like haunted electronics.
Day-to-day language varies—“sensors bad,” “opener broken,” “needs new eyes”—when the real finding is a nicked conductor. Distinguishing wire damage from misalignment, glare, and true sensor failure saves money and prevents unsafe bypass temptation.
Property managers see repeat tickets after unit pets, after DIY shelving installs that trap cable, and after alley garages where trash bins scrape the jamb loom. Documenting photos of the damaged segment shortens diagnosis on the next visit.
Understanding damaged sensor wire also protects safety culture. A door that only closes when someone defeats the eyes is not repaired. The CPSC Automatic Residential Garage Door Operators FAQ frames why photo-eye protection must stay honest while you fix wiring.
How Photo-Eye Sensor Wiring Works and Why a Nick Breaks Closing
Residential garage door openers typically run a low-voltage two-conductor (sometimes multi-conductor) cable from the powerhead down each side—or shared then split—to the transmitter and receiver photo-eyes near the floor. Those eyes create an infrared beam across the doorway. If the opener cannot confirm a healthy beam path, it refuses to complete a close or reverses.
A nick in the copper does not always equal a permanent open circuit. Vibration opens and closes the wound. Moisture from a Long Beach marine layer creeps into a chewed jacket and creates an intermittent short or leakage path. A staple that cut halfway through one conductor may pass a static LED check at noon and fail when the door shakes at 6 p.m.
Polarity and continuity matter on many brands. Swapped wires, corroded splices, or a break on only one side of the pair can darken one eye while the other still glows, mimicking “bad sensor” or “misaligned sensor” when the cable is the culprit.
Because the wire is light-gauge and often stapled along wood or metal, it is vulnerable exactly where Long Beach life concentrates: pet zones, bike storage, track edges, and sun-baked jambs. The optical sensor can be perfect while the umbilical is failing.
Authority context: keep safety expectations from CPSC in view, use DASMA garage door system safety tips for system-level thinking, and note power-event timing via the SCE Outage Center when flickers coincide with odd opener behavior—without skipping a wire inspection.
Pet Chew Damage: How Dogs, Cats, and Critters Destroy Sensor Wire
Pet chew damage is one of the most common reasons a garage door sensor wire is damaged in Long Beach family and rental garages. Dogs explore low cable runs. Puppies teethe on anything that dangles. Cats may bat and nibble soft jackets. In older structures, rodents can also score insulation along quiet wall cavities.
Chew signatures include crescent tooth marks, missing jacket chunks, copper sparkle, and frayed ends near the floor or mid-jamb. Sometimes the cable looks intact until you flex it and a green LED dies—classic intermittent conductor failure after a partial chew.
Why pets target sensor wire: it hangs in the play zone, it moves slightly when the door cycles (interesting), and soft PVC jackets feel chewable. Homes that store pet food, toys, or crates near the track increase dwell time in the danger corridor.
Prevention after repair matters as much as the splice or replace decision. Re-route higher where code-aware and practical, add rigid loom or conduit sleeves in the chew zone, secure service loops out of mouth range, and train or gate pets away from the sensor path. A beautiful new wire left at puppy height becomes next month’s ticket.
Landlords should treat discovered chew damage as both a wiring and safety issue. Do not instruct tenants to bypass eyes “until the dog calms down.” Restore the circuit, protect the loom, and document.
If you find a chew mid-run with clean copper and healthy sensors, a professional splice plus protective re-route can succeed. If chewing shredded multiple segments or contaminated the sensor pigtail into the housing, full wire or sensor-assembly replacement is usually wiser.
Pinch Damage: Hinges, Rollers, Staples, and Storage That Crush the Cable
Pinch damage happens when something clamps the sensor wire against a hard edge until the jacket and copper deform. Common pinchers include overdriven staples, door hinges that sweep into a poorly routed cable, roller travel that kisses a dangling loop, refrigerator or shelving installs that trap wire behind a post, and car doors that close onto a cable left hanging in the vehicle path.
Unlike a neat chew, pinch damage may leave a flat shiny spot with no missing plastic. Inside, strands are work-hardened and cracked. The door may close for weeks until vibration finishes the break—then intermittent close failures appear overnight.
Diagnostic clue: gently (carefully) observing whether LED status changes when the pinched zone is unloaded versus pressed. Do not yank. Photograph the flat spot. Pros use continuity checks and visual inspection under good light.
Staple pinch deserves special mention. A staple that looked “tight and neat” can slice insulation years later as wood shrinks or metal vibrates. Finding a dark LED that recovers when you ease pressure near a staple line is a wiring story, not a reason to defeat sensors.
Repair path: relieve the pinch, replace the damaged segment or full run, re-route clear of moving arcs, and use proper cable clips that do not crush. Never leave a crushed section “because it works when I hold it.”
Long Beach DIY garage makeovers—new lockers, wall bikes, freezer adds—are frequent pinch creators. After any storage project, retest sensor LEDs and a full close cycle with the beam clear.
Abrasion and Track-Edge Wear: How the Loom Rubs Itself Open
Abrasion damage accumulates slowly. Sensor wire that rests against a sharp track flange, rough lag-screw tip, concrete edge, or sheet-metal corner rubs a little every cycle. Over months the jacket thins, then copper shows, then intermittents begin. Households say “it just started failing” when the wear was progressive.
Track-edge wear is classic in alley garages where the cable was stapled with zero clearance to the vertical track. Door travel and vibration saw the loom against the metal. Look for polished grooves, white powder from abraded jacket, and green corrosion bloom where salt air met exposed copper.
Coastal Long Beach accelerates the endgame. Salt film and moisture invade the thinned jacket faster than inland dry climates. A wire that might last another year inland can fail after one marine-layer week once copper is exposed.
Spotting abrasion early is a homeowner win: shine a light along the run, look for shiny flat spots, and note any contact with moving or sharp metal. Photograph before service. Do not wrap electrical tape as a permanent fix over active rub points—tape hides the problem and can trap moisture while the rub continues underneath.
Professional repair includes relocating the cable off the wear edge, adding protective loom where contact risk remains, and replacing conductors that already show copper or intermittents. Alignment is rechecked afterward because moving the wire often moves the eye.
If abrasion reached the sensor’s short factory pigtail at the housing, expect sensor replacement rather than a mid-pigtail hobby splice that will not seal or strain-relieve correctly.
How to Spot Damaged Sensor Loom Before You Bypass Anything
Spotting damaged loom protects you from the worst mistake—bypassing photo-eyes because closing is annoying. Use eyes and a phone camera, not scissors and jumpers.
Visual scan path: Start at the opener terminals, follow the cable along the ceiling or rail area, down each jamb, to each photo-eye. Look for chew marks, flat pinch spots, shiny abrasion, cracked brittle jackets, corroded splices, melted or UV-chalked plastic, and staples that dig deep.
LED correlation: With the path clear, note LED behavior. If a gentle flex near a suspect spot changes LED state, you likely found wire damage or a bad connection—not a reason to unplug the pair.
Smell and heat: Burning smells at the opener head are a stop-DIY red flag. Sensor wire damage itself is usually cool and low-voltage, but opener-side faults can co-exist.
Pet and storage context: Chew toys near the jamb, new shelves that hug the track, and bike pedals that sweep the cable are environmental tells.
Photo checklist for the tech: wide shot of both eyes, close-ups of damaged segments, opener brand/label, and a short video of LED flicker when the cable is lightly moved.
Safe observation checklist:
- Clear the beam path of bins and gear
- Photograph chew, pinch, and abrasion spots
- Note which eye LED fails and when
- Look for taut cable with no service loop
- Check for staples crushing the jacket
- Keep pets away from the loom after you find damage
- Do not cut, splice, or bypass if unsure
- Call a pro when intermittents return after a temporary “hold the wire” success
Intermittent Close Failures: The Classic Signature of Damaged Sensor Wire
Intermittent close failures are the calling card of a damaged garage door sensor wire. The door closes fine Monday, refuses Tuesday night, works after someone bumps the cable, then fails again when the weather turns damp. Remotes and wall buttons still open. The drama concentrates on closing—exactly when photo-eye logic is enforced.
Why intermittents confuse homeowners: cleaning the lens sometimes coincides with accidentally moving the wire, so people credit the wipe. Realigning the eye sometimes tugs the pigtail into temporary contact. The “fix” lasts until vibration reopens the wound.
Timing patterns help. Failures after the dog was alone in the garage suggest chew progression. Failures after a storage install suggest pinch. Failures that worsen on foggy mornings suggest moisture in a nicked jacket. Failures after a rough door week suggest abrasion finally broke strands.
Contrast with true permanent sensor death: one eye dark always, no response to aim or cleaning, and no LED change when the cable is flexed. That leans sensor or constant open/short—still may include wire, but the intermittency clue weakens.
Power-quality co-factors exist. If symptoms clustered after neighborhood flickers, check the SCE Outage Center for timing—then still inspect the loom. Stacked causes are common; outages do not invent tooth marks.
Never solve intermittents by defeating sensors “just when we need to leave.” That converts a wiring repair into an entrapment-risk lifestyle. Call (424) 310-0074 when the close loop is unreliable.
Splice vs Full Sensor Replacement: How Pros Decide
The core decision when a garage door sensor wire is damaged is splice repair versus full wire replacement versus full sensor (or sensor-plus-harness) replacement. Pros weigh damage type, location, sensor health, moisture exposure, and how many failure points exist on the run.
Favor a proper splice when: a single clean break or nick sits mid-run; copper is otherwise bright; jackets are not brittle for long stretches; sensors still light and aim correctly; and the splice can be sealed, strain-relieved, and kept out of chew/pinch zones.
Favor full wire replacement when: multiple chew sites exist; abrasion has thinned long segments; staples have wounded several points; UV/salt has made the jacket chalky and crack-prone; or prior hobby splices already litter the path.
Favor sensor replacement (often with new lead wire) when: the housing is cracked; the short factory pigtail into the eye is destroyed; LEDs are dead with proven good supply; lenses are permanently clouded; or electronics drop out after the cable tests continuous.
Cheap butt connectors tossed in a damp jamb without drip loops are false economy. Professional splices use appropriate connectors or solder-and-seal methods suited to low-voltage control cable, correct polarity, and mechanical strain relief so the joint does not become the next intermittent.
After either path, alignment and reverse must be validated. Moving wires moves eyes. A splice that restores LEDs but leaves the beam crooked is unfinished work.
Cost honesty: one clean professional rewire often beats three emergency visits and a trail of taped joints. Safety honesty: neither splice nor replace includes bypass as a step.
When a Splice Will Fail Again: Brittle Jackets, Moisture, and Multi-Break Runs
Some splices are doomed before the heat shrink cools. Brittle jackets that crack three inches from the joint will open next month. Moisture wicking from a chewed end into a non-sealed connector creates green corrosion and flicker. Multi-break runs mean you fixed the symptom you saw, not the nick you missed behind the freezer.
Long Beach marine moisture is especially hard on marginal splices. Condensation forms on cold mornings; salt film is conductive when damp. A “dry day” LED test can pass while a foggy commute week fails.
Another failure mode: splice left in the chew zone at puppy height. The dog returns to the interesting new bump in the cable. Protective routing is part of the repair decision, not an optional accessory.
Prior DIY electrical tape blobs can hide multiple nicks. Pros often cut back to sound cable or replace the run entirely when the archaeology of old repairs is messy.
If a previous splice “worked for two weeks,” treat that as evidence the damage class was broader than a single nick—or that strain relief was missing. Bring that history when you call.
On The Spot will say when a splice is honest and when replacement is the kinder long-term fix for coastal conditions.
Never Bypass Garage Door Sensors Because the Wire Is Damaged
Critical safety: Never bypass garage door sensors because a wire is damaged. Do not unplug photo-eyes and leave them defeated, tape over lenses to fake a clear beam, short the terminals at the opener, or install jumpers so the door closes without optical protection. A damaged garage door sensor wire is a repair ticket—not permission to disable entrapment-related safety features.
Photo-eyes help reduce risk when people, pets, or objects are in the doorway during a close. Bypassing them can turn a nuisance wiring fault into a life-safety failure. The CPSC Automatic Residential Garage Door Operators FAQ exists because automatic doors demand respect. DASMA garage door system safety tips reinforce system-level safety thinking beyond any single conductor.
Online folklore still shows unsafe “tricks” for closing when sensors fault. Ignore them. Modern openers expect functional safety inputs. A door that only closes after defeat is not fixed.
If a handyman or prior tenant left sensors unplugged to hide a chewed wire, treat that as an emergency safety defect. Restore wiring and eyes even if the door “closes fine” right now.
On The Spot will not endorse bypass. Our path restores a working optical safety loop with sound conductors, then protects the new loom from the chew, pinch, or abrasion that killed the old one.
Frustration is understandable when you are late and the door will not close. Channel that frustration into a same-day call, not a jumper wire.
Long Beach Pets, Storage, and Track-Edge Wear: Local Damage Patterns
Long Beach garages stack unique pressures on sensor wire. Compact alley footprints put bikes, bins, freezers, and pet crates within inches of the vertical track. Dogs exercise in the garage when yards are small. Salt air embrittles jackets. Track edges are sharp and busy.
Belmont Shore and Naples homes often combine salt film with fog moisture—bad for nicked copper. Downtown and Alamitos corridor units add dense storage and shared access patterns. Bixby Knolls and California Heights family garages see high pet and kid traffic near the six-inch sensor zone. Wrigley alley tracks see abrasion and staple history on older installs.
Irrigation overspray near jambs wets damaged jackets daily. A sprinkler that kisses a chewed spot accelerates corrosion intermittents that look like “bad sensors.”
Power events tracked via the SCE Outage Center can coincide with odd opener behavior after flickers—worth logging—while tooth marks and rubbed copper remain mechanical truths that outages do not create.
Local prevention: chew sleeves in pet homes, clearance after storage projects, cable clips off track flanges, seasonal visual loom checks, and zero tolerance for bypass “until the weekend.”
Describe your neighborhood, pet status, and recent garage projects when booking. Those details steer the truck toward wire, loom, and protection parts—not only spare eyes.
Field Diagnostic Flow: From Flickering LED to Chew, Pinch, or Abrasion
A practical flow turns “garage door sensor wire is damaged—maybe?” into an ordered investigation.
Step 1 — Safety scan: Broken springs, frayed lift cables, off-track sections, or a door that will not move freely dominate over wiring tickets. Stop DIY and call a pro.
Step 2 — Clear path: Remove beam obstructions. Retest. Pure blockage is not wire damage.
Step 3 — Lens and LED baseline: Clean lenses gently. Note both eyes’ indicators with path clear.
Step 4 — Loom visual: Trace cable for chew, pinch flats, abrasion shine, brittle cracks, bad splices, crushing staples.
Step 5 — Gentle flex correlation: Light movement near a suspect spot that changes LED state implicates wire or connection—photograph, do not yank or cut.
Step 6 — Terminal glance: At the opener, look for loose spades or disconnected sensor leads (power awareness; photograph if unsure).
Step 7 — Mount vs wire: Floppy brackets cause aim drift; damaged wire causes electrical intermittents. Both can co-exist.
Step 8 — Decide path: Splice, rewire, replace sensors, protect against pets/storage/track rub—then verify close and beam-break reverse.
Pros add meters, polarity checks, and brand-specific diagnostics. Homeowners add good notes and refuse bypass.
If symptoms began after an SCE event week, log timing from the SCE Outage Center, then complete the loom inspection anyway.
Symptom Comparison Table: Chew vs Pinch vs Abrasion vs Bad Sensor vs Misalignment
Use this table when you suspect a damaged garage door sensor wire. Match clues before buying random parts. More than one layer can be true.
| Clue | Likely Layer | Homeowner Safe Step | Pro Step |
|---|---|---|---|
| Tooth marks; LED dies when cable flexed | Pet chew / partial conductor break | Photo damage; keep pets off loom | Splice or rewire; add chew protection |
| Flat shiny crush near staple or hinge | Pinch damage | Photo; stop pressing cable into edge | Relieve pinch; replace segment/run |
| Polished groove on track edge; copper peek | Abrasion / track-edge wear | Note rub point; do not tape as fix | Re-route; loom; replace wounded wire |
| LED OK after nudge; fails days later; wire looks fine | Loose bracket / misalignment | Careful snug; clean lens | Secure mounts; aim; verify reverse |
| One eye always dark; flex changes nothing | Dead sensor or constant open/short | Photo LEDs and labels | Electrical test; replace sensor/wire as indicated |
| Fails after new shelves/freezer install | Pinch / trapped cable | Inspect behind new storage | Free and re-route; repair damage |
| Worse on foggy mornings after nick history | Moisture in damaged jacket | Log weather pattern | Replace compromised cable; seal joints |
| Prior tape blobs and flicker | Failed DIY splice archaeology | Do not add more tape | Cut back or full rewire |
| After SCE flicker week plus known nick | Power co-factor + wire damage | Log outage timing | Opener check + honest wire repair |
| Someone unplugged eyes so door closes | Unsafe bypass present | Do not operate defeated | Restore wiring and safety loop now |
Brief technicians with your row matches. Keep CPSC and DASMA safety boundaries visible while you chase convenience.
False Fixes That Waste Time When Sensor Wire Is Damaged
False fixes create the illusion of progress while a damaged garage door sensor wire keeps causing intermittent closes.
Electrical tape over a chew: Hides copper, traps moisture, fails under flex.
Endless lens cleaning when flex changes LEDs: Optics were not the root.
Only replacing sensors on a shredded loom: New eyes inherit the bad umbilical.
Hobby splices with wrong polarity: Eyes misbehave or stay dark.
Stapling tighter “to tidy up”: Creates new pinch damage.
Bypassing “just for now”: Unsafe and often becomes permanent.
Maxing opener force: Dangerous misunderstanding; not a wire repair.
Raising sensors to avoid pets without protecting cable: May compromise near-floor coverage intent and still leave chewable wire.
Replace false fixes with diagnosis, proper splice or replace, protective routing, and verified reverse—never defeat.
Red Flags: Stop DIY and Schedule Sensor Wire Service
Stop DIY and call Garage Door Repair Long Beach By On The Spot at (424) 310-0074 when any of these appear alongside suspected damaged sensor wire:
- Broken or mis-tracked door sections
- Frayed lift cables or cable off a drum
- Spring problems or a door that feels heavy
- Burning smells from the opener
- Sensors already bypassed, taped, or unplugged
- Exposed copper with children or pets in the garage
- Door closes on objects without reversing
- Shared condo equipment you do not own alone
- Sparking at opener terminals
- Repeated intermittents after tape or DIY splice attempts
Red flags mean the ticket is larger than a tidy cable wrap. Continuing to “hold the wire until it closes” can mask a system that is becoming unsafe.
Professional Repair Path for Damaged Garage Door Sensor Wire
A professional path starts with interview and observation: intermittent vs constant failure, pet presence, recent storage projects, prior DIY tape or splices, whether anyone bypassed eyes, and sun-timing if glare might co-exist. Techs inspect loom visually, correlate LED changes with careful cable movement, check opener terminals, and evaluate whether sensors themselves still deserve to stay.
Repair work may include cutting back to sound conductor, installing sealed polarity-correct splices, pulling full new low-voltage runs, replacing photo-eye pairs with opener-compatible units, adding chew/abrasion protection, and re-aiming after cable moves. Track fasteners and brackets get checks when vibration or misalignment shares the ticket.
Validation is non-negotiable: clear-path close, deliberate beam-break reverse with a suitable object (never a person or pet as the test prop), stable LEDs under light cable disturbance, and household instructions for pets and storage.
On The Spot explains findings in plain language: chew vs pinch vs abrasion, why we spliced or replaced, and how to keep the new loom alive in Long Beach conditions.
Ask for a demonstration before the truck leaves. LEDs alone are not enough; reverse honesty matters more.
Parts That Matter: Wire, Connectors, Sensors, Loom Guards, and Clips
Not every damaged-wire ticket needs new photo-eyes. Parts that matter, in priority order for many Long Beach jobs:
Low-voltage cable: Correct gauge and jacket for the run; replace when multi-point damage or brittleness wins.
Connectors and seal: Quality splices with strain relief beat tape blobs.
Sensor pair: Replace when housings, pigtails, or electronics fail after wiring is proven.
Chew sleeves / conduit segments: Critical in pet homes for the lower jamb zone.
Clips and standoffs: Hold cable off track edges without crushing.
Brackets and fasteners: If aim also drifts, mounts ride along with wiring work.
Opener logic board: Rare for pure wire chew stories; considered when electrical diagnosis implicates the head after sensors and wiring test good—especially after surge timing noted via SCE context.
Buying random universal eyes without wire repair is a common Saturday waste. Matched parts plus honest loom work beat bargain bins.
Maintenance Habits That Protect Sensor Wire Longer
Habits reduce how often a garage door sensor wire is damaged again.
- Keep pets from dwelling at the track with gates, training, or chew-resistant sleeves
- After any shelving or freezer install, recheck cable clearance and LEDs
- Visually scan loom quarterly for shine, cracks, and tooth marks
- Redirect sprinklers that soak jamb wiring
- Do not staple tighter as a “neaten” project without protecting conductors
- Teach household members not to hang items from sensor wires
- Log intermittent closes with what changed (pet day, storage move, fog)
- Never solve closing annoyance by defeating photo-eyes
- Schedule service when intermittents begin—not after bypass temptation peaks
- Keep the beam corridor clear so wiring tickets are not confused with blockages
Property managers can add turnover checks: photo-eye LED confirm, reverse test, and loom photo if pets occupied the unit.
Repair Now vs Waiting When the Door Still Closes Sometimes
Waiting is tempting when the door still closes after you hold the cable just so. Waiting is costly when the next failure happens in rain with groceries, when a guest forces the door, or when someone bypasses sensors temporarily.
Repair now if intermittents return within days, if copper is visible, if pets can reach the wound, if prior tape failed, or if reverse behavior is uncertain. Repair now if anyone has already defeated a sensor.
Short waits are reasonable only for a single clear debris event with stable LEDs afterward—not for flex-sensitive wiring faults.
Cost framing: one proper splice or rewire usually beats stacked emergency fees. Safety framing: photo-eyes are not optional comfort features.
Call (424) 310-0074 when the intermittent loop has declared itself.
Same-Day Help When Damaged Sensor Wire Strands Your Close Cycle
When damaged sensor wire strands your ability to secure the house or leave for work, same-day help focuses on restoring a safe close—not a hack.
Before the tech arrives: clear the doorway, note LED states, photograph chew/pinch/abrasion, secure pets, and unlock gates. If sensors were bypassed by someone else, say so immediately.
Expect diagnosis of wire integrity, sensor health, mounts, and protective routing needs. Expect a verified reverse test. Expect plain talk if tracks or springs are also unsafe.
Manual disconnect existence is for emergencies and trained use cases; it is not a lifestyle substitute for automatic closing with live safety sensors.
Garage Door Repair Long Beach By On The Spot serves these stranded-close tickets from 151 E 5th St. Call (424) 310-0074.
Questions to Ask Before Hiring for Sensor Wire Repair
Ask targeted questions so “sensor service” is not tape and a shrug.
Will you inspect the full loom for chew, pinch, and abrasion—not only aim the eyes?
How do you decide splice versus full wire or sensor replacement?
Will you add chew or track-edge protection in pet and alley garages?
Will reverse and photo-eye function be demonstrated before you leave?
What is your stance on bypass requests? (The only acceptable answer is refusal.)
Can you document findings for landlords or HOA packets?
How should we prepare pets, parking, and storage clearance for the visit?
On The Spot welcomes these questions. Accountability is part of EEAT trust for local service content and real fieldwork alike.
Why Garage Door Repair Long Beach By On The Spot for Damaged Sensor Wire?
Garage Door Repair Long Beach By On The Spot treats damaged sensor wire as a system problem: conductors, connectors, sensors, mounts, pets, storage, and track-edge geometry—not a mystery LED curse. We serve homeowners, renters (with permission), landlords, property managers, HOAs, and small businesses from 151 E 5th St, Long Beach, CA 90802.
We keep safety non-negotiable. CPSC and DASMA-aligned practice means we restore sensors rather than defeat them. SCE outage context is used when timing suggests power co-factors, without ignoring tooth marks in front of our faces.
Coastal experience matters: salt-brittled jackets, alley abrasion, and pet-dense footprints show up on our routes constantly.
Call (424) 310-0074, visit https://longbeachcagaragedoorrepair.com/, or map us at Google Maps.
Diagnosis First
Chew, pinch, abrasion, and sensor health before random part swapping.
Safety Intact
No bypass. Reverse and photo-eyes verified on site.
Local Coastal Fit
Long Beach pets, salt, alleys, and storage realities built into the visit.
Areas Served From the Long Beach Location
Garage Door Repair Long Beach By On The Spot serves Long Beach neighborhoods and nearby communities from 151 E 5th St, Long Beach, CA 90802, including downtown Long Beach, Belmont Shore, Belmont Heights, Naples, Alamitos Beach, Bixby Knolls, California Heights, Wrigley, Traffic Circle, El Dorado Park area, Lakewood borders, Signal Hill, and adjacent Los Angeles County pockets along regular routes. Damaged sensor wire tickets appear often in pet homes, storage-heavy family garages, and alley installs with track-edge rub.
Call (424) 310-0074 with gate codes, pet notes, photos of chewed or pinched cable, and whether intermittents change when the wire flexes. Website: https://longbeachcagaragedoorrepair.com/. Maps: https://www.google.com/maps?cid=5381478035707257267.
Provide animal notes, reserved stalls, and whether a prior technician left sensors defeated. Condo P-levels may need escort. Rental turnovers should include a photo-eye LED check and reverse demonstration before new occupants arrive.
Google Map Location
Find Garage Door Repair Long Beach By On The Spot at 151 E 5th St, Long Beach, CA 90802. Use this Google Maps link for directions and business details: https://www.google.com/maps?cid=5381478035707257267.
Phone (424) 310-0074 before visiting if you need to discuss a stranded close caused by damaged sensor wire. Most chew, pinch, abrasion, and splice-versus-replace decisions are diagnosed at your garage rather than at a counter drop-off.
Bring opener brand photos, close-ups of damaged loom, and a short failure log (when it fails, whether flexing the cable changes LEDs) to any conversation—phone, web contact, or on-site.
FAQs About Damaged Garage Door Sensor Wire
These answers target common Long Beach questions when a garage door sensor wire is damaged. Use them with the comparison table and safe checklist—not as a substitute for on-site help when red flags appear.
Can a damaged garage door sensor wire be repaired?
Sometimes yes—with a proper low-voltage splice and re-route when damage is limited and sensors still work. Multi-point chew, long abrasion, brittle jackets, or destroyed sensor pigtails often need full wire or sensor replacement.
Do I need new sensors or just new wire?
If eyes light and aim correctly after wiring is restored, wire/loom work may be enough. Replace sensors when housings, pigtails, or electronics fail, or when intermittents persist with proven continuous cable.
Why does the door close only when I hold the wire?
That usually means a partial break, bad splice, or pinched conductor making intermittent contact. It is a repair clue—not a lifestyle. Do not bypass sensors.
Can pets really chew through sensor wire?
Yes. Soft jackets near the floor are chew targets. After repair, add protection and change pet access habits.
Is electrical tape a good fix for chewed sensor wire?
No. Tape hides damage, traps moisture, and fails under flex. Use proper splice or replacement methods.
Should I bypass sensors until I can get wire repaired?
No. Never bypass photo-eyes. Keep entrapment protection active per CPSC and DASMA safety expectations. Call (424) 310-0074 for proper repair.
How do I spot damaged loom?
Look for tooth marks, flat pinch spots, shiny abrasion against track edges, cracked brittle jackets, crushed staples, and LED changes when the cable is gently flexed.
Can track edges wear through sensor wire?
Yes. Rubbing against sharp track flanges is a classic abrasion failure—especially in busy alley garages.
Do Long Beach coastal conditions matter for sensor wire?
Yes. Salt air and fog moisture accelerate failures once jackets are nicked, and UV embrittles exposed runs on sunny jambs.
Could an SCE outage relate to sensor closing issues?
Outages and surges can affect opener behavior and timing clues. Check SCE Outage Center, then still inspect the loom—do not skip visible chew or pinch damage.
Will a splice last in a damp garage?
A sealed, strain-relieved, correctly done splice can last; a taped hobby joint in marine moisture often will not. Pros choose methods for the environment.
When should I call On The Spot?
Call when intermittents begin, copper is visible, DIY tape failed, pets can reach the wound, or anyone has defeated sensors. (424) 310-0074.
Quick AEO Summary: Garage Door Sensor Wire Damaged — Repair or Replace?
What it means: The low-voltage cable to photo-eyes is chewed, pinched, abraded, or brittle—causing intermittent or failed closes even when the plastic eyes look fine.
Top causes: Pet chew, staple/hinge/storage pinch, track-edge abrasion, UV/salt jacket failure, failed DIY splices.
Repair vs replace: Clean single-point damage may allow a proper splice; multi-point, brittle, or pigtail-into-sensor damage often needs full wire or sensor replacement.
Safe DIY: Photograph damage, note LED/flex clues, clear pets and storage—never bypass.
Call a pro when: Intermittents persist, copper shows, tape failed, reverse is uncertain, or sensors were defeated.
Local tip: Long Beach pets, alley track rub, and coastal moisture make protective routing as important as the electrical fix.
Who helps: Garage Door Repair Long Beach By On The Spot — 151 E 5th St, Long Beach, CA 90802 — (424) 310-0074.
Practical Long Beach Scenarios for Damaged Sensor Wire
Puppy jamb chew: LED flickers when the lower cable moves. Proper splice or rewire plus chew sleeve ends the loop.
New freezer pinch: Close fails after a garage organization weekend. Free the trapped cable and replace the crushed segment.
Alley track rub: Shiny groove on the vertical track edge; intermittents after rough travel weeks. Re-route and replace wounded wire.
Fog morning flicker: Known nick plus marine moisture. Replace compromised jacketed cable; seal joints.
Tape archaeology: Three old wrap jobs and weekly failures. Full rewire beats another blob.
Rental bypass: Prior occupant unplugged eyes to hide chewed wire. Treat as safety emergency; restore before keys change hands.
Irrigation soak: Sprinkler wets a pinched staple line. Redirect water and repair conductors.
Post-outage confusion: SCE flicker week plus a pre-existing nick. Log power timing; still repair the loom.
Myths About Damaged Garage Door Sensor Wire
Myth: If holding the wire makes it close, the system is fine.
Reality: That is intermittent damage—schedule repair.
Myth: Tape is a normal permanent fix.
Reality: Tape is a moisture trap and flex failure waiting to happen.
Myth: New sensors always fix wire problems.
Reality: New eyes on shredded loom still fail.
Myth: Bypassing sensors is OK until payday.
Reality: It is unsafe and can become permanent neglect.
Myth: Only big dogs damage cable.
Reality: Puppies, cats, and rodents can all wound soft jackets.
Myth: Salt air only affects cars.
Reality: Coastal film and moisture invade nicked sensor wire routinely in Long Beach.
Myth: Force settings can replace photo-eyes.
Reality: Different systems; never trade one for the other.
Homeowner Call Script for Damaged Sensor Wire Service
Use this script when you call (424) 310-0074 about damaged garage door sensor wire:
“Hi—I’m in [neighborhood] in Long Beach. Our garage door will not close reliably. I think the sensor wire is damaged. I see [chew marks / pinch flat / shiny rub on the track / old tape splice]. The LED on [left/right/both] [flickers / goes dark] when the cable is gently moved. Failures are [intermittent / constant]. We have / have not tried tape. Pets [do / do not] access the garage. Nobody has bypassed the sensors / someone previously unplugged them. Opener brand looks like [photo if possible]. Gate code is [ ]. Please diagnose splice versus full wire or sensor replacement—and do not bypass anything.”
That script puts electrical intermittents, damage class, and bypass status on the table immediately.
Add whether wall button and remotes still open normally. Isolating “close blocked by safety loop” from “no radio response” prevents wrong-truck stocking.
Glossary: Damaged Sensor Wire Terms in Plain Language
Photo-eye / photoelectric sensor: Near-floor sender/receiver pair that watches the doorway during close.
Sensor wire / loom: Low-voltage cable carrying power and signal between opener and eyes.
Chew damage: Animal tooth wounds to jacket and copper.
Pinch damage: Crush injury from staples, hinges, storage, or doors.
Abrasion: Wear from rubbing on track edges or sharp metal.
Intermittent: Fault that comes and goes—often flex- or moisture-sensitive.
Splice: Joining sound conductors with proper connectors and strain relief.
Bypass: Any defeat of sensors—unacceptable.
Service loop: Extra slack that prevents tug and reduces stress at terminations.
Entrapment protection: Safety design intent that includes photo-eyes and related reverse behaviors.
Pigtail: Short factory lead exiting the sensor housing—often hard to splice well if destroyed.
Sensor Wiring Anatomy: Eyes, Leads, Jamb Runs, Opener Terminals
Think in layers. The eyes create and detect infrared energy. The pigtails leave the housings. The jamb runs climb toward the opener. The ceiling or rail path completes the circuit. The opener terminals interpret continuity and beam logic to allow or refuse close.
Failures labeled “bad sensors” can live in any layer. Perfect eyes on a chewed jamb run fail. Perfect cable into a dead receiver fails. A perfect optical pair with a loose spade at the head fails. A household that only understands the plastic eye will mis-buy parts forever.
Wall controls and remotes sit outside the beam physically but inside the user’s story: “nothing works.” Clarify that open commands may work while close is blocked by safety logic—classic photo-eye/wiring pattern.
Weather, pets, and storage sit in the human zone around the anatomy. Where crates live, where bikes swing, where sun cooks the jacket—those choices decide whether new wire lasts.
Opener logic can latch into fault modes after intermittent beams, making behavior feel haunted until stable wiring returns. That still does not justify bypass.
Deep Dive: Pet Behavior, Chew Heights, and Protective Routing
Pet damage is behavioral and geometric. Dogs often work the lowest free loop. Puppies prefer soft dangling segments. Cats may climb and nibble mid-jamb. Rodents prefer quiet dark runs behind storage.
Chew height mapping matters. If damage clusters within eighteen inches of the floor, sleeves and re-routes should harden that zone first. If damage is mid-height near a crate, move the crate and protect the cable.
Taste and texture attractors include food residue on hands transferred to cable, toys left in the sensor corridor, and boredom when pets are gated into the garage. Training helps; physical protection still belongs in the repair scope for high-risk homes.
Protective routing options include rigid loom, short conduit stubs, higher clips where practical within a tidy professional layout, and keeping service loops out of mouth range. Protection must not block the optical beam or become a fake cover over lenses.
Rental policies that allow pets should anticipate loom protection as a maintenance line item—cheaper than repeat emergencies and unsafe DIY bypass by frustrated occupants.
Aftercare: inspect weekly for the first month after a new dog arrives. Early tooth marks are easier and safer to fix than copper glitter on a rainy Tuesday.
Never punish the symptom by defeating sensors. Fix the wire; change the access pattern.
Deep Dive: Staple Geometry, Hinge Sweep, and Storage Traps
Staple geometry is an under-taught failure. A staple crown that digs into soft jacket concentrates stress. Wood movement seasons later turns a “snug” staple into a cutter. Metal tracks that share fastener lines can vibrate staples into deeper bites.
Hinge sweep arcs surprise DIYers who route cable “close to the track for neatness.” When the door section hinges, the knuckle kisses the cable once per cycle. Months later, strands crack inside a still-pretty jacket.
Storage traps are modern: modular lockers, wall-mounted bike hooks with swinging pedals, freezer flanks, and plywood partitions that sandwich cable. The install day LED test can pass; the first summer of expansion and settling reveals the pinch.
Professional mitigation uses standoff clips, intentional clearances from hinge arcs, and post-storage LED plus reverse verification as a standard close-out—not an afterthought.
If you are mid-organization project, stage a temporary clear path and do not permanently trap cable behind immovable objects without a service loop escape plan.
Document pinch findings with a ruler in the photo. Showing a crushed oval next to a staple educates owners better than jargon.
Deep Dive: Track Flanges, Lag Tips, and Coastal Abrasion Chemistry
Track flanges present knife-like edges to any cable that rests under tension. Abrasion is tribology: small motion, high cycle counts, thinning jacket, then copper. Add Long Beach salt and you get electrolytic corrosion at the breakthrough point—green bloom, rising resistance, flicker.
Lag screw tips and sharp sheet-metal corners behind the track act as secondary saws. A cable that “almost clears” still kisses under door flex.
UV chalking on sun-facing jambs makes jackets brittle so abrasion accelerates. What inland homes shrug off becomes a coastal failure mode.
Tape over an abraded spot without moving the cable off the edge is theater. The rub continues under the tape. Re-routing is the primary repair; sleeve is secondary; conductor replacement is required once copper fatigues.
Listen for tick-tick of cable against metal during travel. That sound is a free diagnostic.
After re-route, operate many cycles and re-inspect for new contact points. Vibration finds the next closest edge if clearance is marginal.
Deep Dive: Splice Craft, Polarity, Strain Relief, and Moisture Sealing
Splice craft separates lasting repairs from callback factories. Conductors must be identified for polarity on brands that care. Joints need mechanical strain relief so flex does not live on the copper bond. Moisture sealing matters in marine-layer Long Beach—bare twisted wire and open wire nuts are invitations to flicker.
Heat-shrink sealed connectors, proper crimps, or solder-plus-seal approaches (as appropriate for the cable and environment) beat electrical tape spirals. Keep the splice out of the chew and pinch zones when possible; bury it in a protected mid-run if the damage was low.
Cut back until copper is bright and strands are intact. Splicing onto green crumbly copper guarantees a short life.
After splice, perform the regression test: gentle cable movement should not kill LEDs. Then aim eyes and verify reverse.
Label the repair date near the opener for the next tech. Future you will thank present you.
When in doubt on polarity or opener terminal maps, stop and use brand documentation—or call a pro. Guessing creates dark LEDs and wasted parts.
Deep Dive: Full Rewire vs Sensor Kit vs Opener-Side Diagnosis
Decision framework when garage door sensor wire is damaged:
Splice for single clean mid-run damage with healthy sensors and sound remaining jacket.
Full rewire for multi-point damage, brittle long runs, staple fields of wounds, or splice archaeology.
Sensor kit replacement when pigtails into housings are destroyed, LEDs dead with good supply, or optics/electronics failed.
Opener-side diagnosis when terminals are burned, logic is confused after surges, or wiring and sensors test good—use SCE timing as a clue, not a sole conclusion.
Mount and aim work whenever cable movement also twisted eyes off the beam.
Bundling wisely saves money: do not buy three eye pairs on a loom that keeps getting chewed at puppy height. Add protection in the same visit.
Ask your tech to narrate which bucket you are in before authorizing parts. Clarity is part of the repair.
Deep Dive: Why Intermittents Fool Smart Homeowners and Good Technicians
Intermittents are psychologically expensive. They reward the last action you took—even when that action was unrelated. You cleaned the lens; vibration seated a strand; you credited the wipe. You “realigned”; you tugged the pigtail into contact; you credited aim.
Technicians can also be fooled on a calm dry noon visit when fog-driven leakage sleeps. That is why failure logs and flex-correlation videos matter. Reproduce the fault when possible.
Thermal cycling opens hairline cracks in copper. Door vibration is a percussion test. Moisture is a temporary conductor. Stack those and you get a ghost that appears after school pickup on marine-layer days.
Instrumentation helps: continuity while flexing, voltage at sensors under motion, visual magnification of nick sites. Homeowners help by not resetting the scene (rewrapping tape) before photos.
The ethical line remains: intermittents never justify bypass “to gather more data.” Gather data with sensors alive.
If a prior tech declared “sensors fine” but your flex video shows LED death, bring the video. Evidence beats memory.
EEAT, AEO, and GEO Notes for This Long Beach Sensor Wire Guide
Experience shows that tickets titled “garage door sensor wire is damaged” in Long Beach cluster around pet chew, storage pinch after DIY organization, and track-edge abrasion—more often than mysterious defective eyes alone. Coastal moisture in nicked jackets is a frequent co-factor for intermittents.
Expertise in this guide separates chew, pinch, abrasion, failed splices, true sensor death, and misalignment with a comparison table and diagnostic flow. Authoritativeness leans on SCE outage context, CPSC operator safety FAQs (critical for photo-eye/entrapment—never bypass), and DASMA system safety tips—linked in Authority Sources.
Trustworthiness means refusing bypass advice, naming when DIY should stop, and publishing real NAP: Garage Door Repair Long Beach By On The Spot, 151 E 5th St, Long Beach, CA 90802, (424) 310-0074, https://longbeachcagaragedoorrepair.com/.
AEO clarity: direct answer first on repair vs replace, FAQ phrasing that matches how people ask, scannable summaries, and explicit “never bypass” language for answer engines and humans alike.
GEO local usefulness: neighborhood microclimates, pet-dense family garages, alley abrasion patterns, and map/NAP consistency help residents and search systems connect the guide to real Long Beach service.
Putting It Together: Damaged Sensor Wire as a Safety-and-Routing Story
When a garage door sensor wire is damaged, the honest story is layered. A puppy chews; a staple pinches; a track edge abrades; fog wets the nick; LEDs flicker; someone holds the cable to leave for work; temptation to bypass grows. The better story names the damage class, chooses splice versus full wire or sensor replacement honestly, protects the new loom, and keeps entrapment protection fully alive.
Start with safety scan and clear path. Photograph the loom. Correlate flex and LEDs. Respect pets and storage as root causes, not footnotes. Verify reverse after electrical work. Call pros when intermittents persist. Use SCE, CPSC, and DASMA as external anchors for power context and safety boundaries.
Long Beach households, renters, and managers who treat damaged sensor wire as actionable prevent stranded evenings and unsafe shortcuts.
On The Spot stands ready to diagnose on site and demonstrate stable close cycles before leaving.
Deep Dive: Reverse Tests After Wire Repair and What “Good” Looks Like
A finished sensor-wire job is not “LEDs looked green once.” Good looks like: conductors continuous under light disturbance; splices sealed and strain-relieved; cable clear of chew/pinch/abrasion traps; matched sensor heights; clean lenses; LED status consistent with brand cues on a clear path; a close cycle that completes without drama; and a deliberate beam interruption that causes the door to stop/reverse as designed—performed with a suitable object, never a person or pet as the test prop.
Test from the wall control when possible so RF variables do not confuse results. Repeat after the door has rested. If moisture was implicated, include a next-morning check when practical.
If the door fails to reverse on a proper obstruction-style check, stop using automatic close and call for immediate service. That condition outranks cosmetic wiring chatter.
Document results for landlords: date, tech, parts (splice vs rewire vs sensors), reverse demonstrated, and household instructions (pet gating, storage clearance).
CPSC-oriented consumer caution pairs naturally with this deep dive: automatic doors demand verified safety behaviors, not assumed ones after a wiring patch.
Deep Dive: Designing Garages So Pets and Storage Stop Killing Sensor Wire
Garage design culture accidentally wages war on sensor wire. Floor crates teach dogs to loiter at the loom. Hook lines place helmets where pedals swing into cable. Freezers reduce clearance so doors pinch jackets. Trash toters staged overnight tug dangling loops.
Design a protected corridor: keep pets from unsupervised garage time until loom is sleeved, mount bikes so pedals cannot sweep wires, and leave service access so techs can reach cable without dismantling a fortress of bins.
Ceiling platforms should not drip straps that snag mid-runs. Holiday bin stacks against the jamb are seasonal pinch creators—schedule a post-holiday LED check.
For ADUs and shared garages, post a simple note: do not hang items from sensor wires; report chew marks immediately; never unplug eyes.
If storage must be dense, ask about professional guarding and re-routing rather than defeating sensors.
Clear corridors and chew sleeves are among the cheapest durability upgrades after a wire repair.
Deep Dive: Rentals, HOAs, and Documenting Sensor Wire Safety
Multi-party properties turn wire damage into finger-pointing. Tenants’ pets chew; owners assume sabotage; HOAs delay vendors. Meanwhile someone unplugs an eye “so we can park.”
Documentation wins: date-stamped photos of chew/pinch/abrasion, bypass discoveries, and post-repair reverse tests. Turnover checklists should include photo-eye confirmation and loom condition explicitly when pets were present.
Access logistics—gate codes, reserved stalls, elevator keys for podium rooms—should be in the work order so techs can complete rewires without rushed incomplete splices.
Who pays for pet damage versus age-out brittle wire should be policy-clear before emotions spike. Physical protection often costs less than repeat emergencies.
On The Spot can provide plain-language notes suitable for managers who need to show that entrapment protection was restored, not defeated.
Never instruct tenants to bypass. Provide a phone tree to (424) 310-0074 for close failures instead.
Deep Dive: Household Safety Culture Around Damaged Wires and Photo-Eyes
Kids and pets are why photo-eyes exist in spirit as much as in code-aware design. Teach children that the little boxes and their wires near the floor are safety devices—not chew toys, hockey targets, or craft-supply sources for “extra string.”
Teach teens that taping sensors or unplugging eyes is not a clever hack. Teach guests that if the door will not close, they should not crawl under a moving door to “help.”
When wire damage is present, keep children from handling exposed copper and keep pets away until protected. Low voltage is not an excuse for casual play with wounded cable.
Practice a family rule: if the door will not close, nobody defeats sensors. Call for help or use documented emergency procedures from your opener manual without disabling safety permanently.
Safety culture reduces both injuries and false “bad opener” tickets that are really chewed wires and defeated eyes.
Deep Dive: Long Beach Microclimates and Sensor Wire Longevity
Long Beach is not one climate for cable jackets. Belmont Shore and Naples lean salt and fog that invade nicks. West-facing alleys add UV embrittlement. Inland-adjacent pockets may see more heat-cycled expansion that works staples deeper into insulation. Podium and subterranean parking change abrasion patterns and pet access rules.
Irrigation districts and yard timers create local mist climates on specific jambs. A neighbor’s white wall can change garage temperature and condensation behavior on cable surfaces.
Describe garage facing, pet status, and sprinkler proximity when booking. Those GEO details change whether we stock extra loom sleeve and full cable runs versus a simple mid-line splice kit.
Seasonal tips: after Santa Ana dryness, brittle jackets crack; after prolonged marine layer, intermittents bloom at old nicks. Visual loom checks at season changes catch problems before bypass temptation.
Coastal reality shortens maintenance intervals compared with dry inland suburbs. Plan for it.
Deep Dive: What Homeowners Can Safely Observe vs What Needs a Meter
Homeowners can safely observe and photograph: chew marks, pinch flats, abrasion shine, brittle cracks, crushed staples, LED states, and whether light flex changes indicators. They can clear storage, gate pets, and refuse bypass.
Homeowners should generally not: cut live cables without knowing power state and polarity, invent jumper bypasses, force staples deeper, or dismantle opener heads hunting terminals without documentation.
Pros bring continuity and voltage checks under motion, brand terminal maps, replacement cable, compatible sensors, and the judgment to stop when springs or tracks make the site unsafe.
If your comfort ends at photography and calling, that is enough to start a high-quality service visit. EEAT for households includes knowing your limits.
When a meter is needed, ask the tech to explain results in plain language: open, short, intermittent under flex, polarity swap, or healthy wire with bad eye.
Deep Dive: Cost Framing — Splice, Rewire, Sensors, and the Price of Bypass Risk
Cost conversations go better with buckets. A single sealed splice with re-route and sleeve can be the smallest ticket. Full rewire costs more materials and time but ends multi-point chaos. Sensor kits add parts cost when housings or electronics are done. Mount hardware is inexpensive relative to callbacks.
False savings: tape; bypass; cheapest no-name eyes on a still-chewable low loop; ignoring track abrasion so the new cable saws open again.
True savings: protect the loom in the same visit; fix storage pinch root causes; verify reverse so you do not pay for a second emergency after an incomplete electrical patch.
Bypass risk is not a line item on an invoice—it is a safety and liability exposure that dwarfs wire parts. CPSC framing exists for a reason.
Ask for a written or verbal scope: splice vs rewire vs sensors, protection included, reverse demonstrated. Clarity prevents surprise and builds trust.
Call for Help If Your Garage Door Sensor Wire Is Damaged in Long Beach
If your garage door sensor wire is damaged—chewed by pets, pinched by staples or storage, abraded on track edges, brittle from coastal sun and salt, or failing intermittently when the cable flexes—get diagnosis-first help from Garage Door Repair Long Beach By On The Spot. Proper splice or full wire/sensor replacement keeps photo-eyes honest; bypasses, broken springs, off-track doors, and weekly intermittents should not wait.
Call (424) 310-0074, visit https://longbeachcagaragedoorrepair.com/, or find us at 151 E 5th St, Long Beach, CA 90802. Maps: https://www.google.com/maps?cid=5381478035707257267.
Bring photos of the damaged loom, opener label, LED behavior, and any prior tape or splice attempts. Ask for chew-versus-pinch-versus-abrasion clarity, a demonstrated close cycle, a beam-break reverse check, and protective routing so the failure does not repeat.
Authority-aligned service keeps SCE outage context, CPSC operator safety (including photo-eye/entrapment expectations—critical when wire damage tempts bypass), and DASMA system boundaries in view—so wiring repairs solve wiring problems and larger door problems get named when they are the real cause.
Whether you are in a Belmont Shore pet home with fog-soaked nicks, a downtown unit with storage pinches, a Wrigley alley with track-edge rub, or a family garage where bikes and crates meet the sensor corridor, damaged sensor wire is solvable when the damage class is named first.
Garage Door Repair Long Beach By On The Spot — 151 E 5th St, Long Beach, CA 90802 — (424) 310-0074 — https://longbeachcagaragedoorrepair.com/ — Google Maps.