
Long Beach Weather Seal Guide
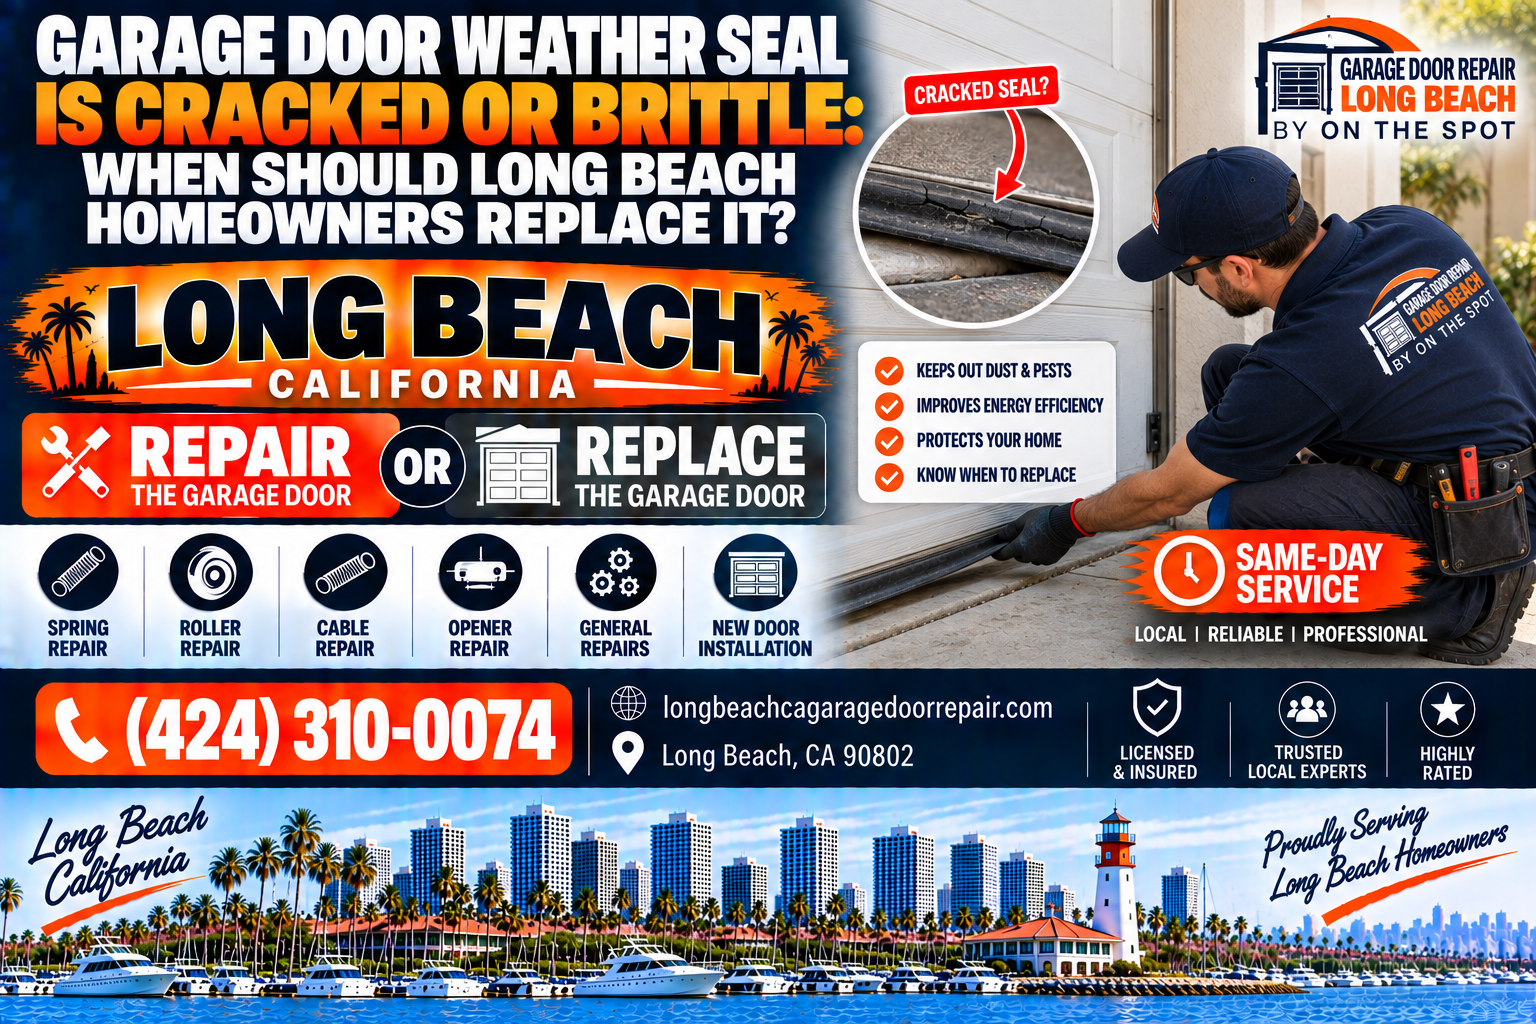
Garage Door Weather Seal Is Cracked or Brittle: When Should Long Beach Homeowners Replace It?
When a garage door weather seal is cracked or brittle, Long Beach UV, salt air, and hot concrete are often to blame. Learn when to replace bottom seals, how they differ from side and top weatherstripping, how floor contact gaps mislead diagnosis, what DIY is safe, and when to call a pro for drafts, bugs, and water intrusion.
Garage Door Repair Long Beach By On The Spot helps homeowners, renters, landlords, property managers, HOA communities, and small businesses restore weatherproof, pest-resistant garage thresholds with coastal-aware service across Long Beach, CA.
UV + Salt Aging
Bottom vs Side/Top
Drafts + Water + Pests
CPSC + DASMA + SCE
Serving Long Beach, CA
Table of Contents
Direct Answer: When Should Long Beach Homeowners Replace a Cracked or Brittle Garage Door Weather Seal?
Direct answer: Replace a cracked or brittle garage door weather seal when the rubber or vinyl no longer compresses cleanly against the floor, when splits, hardness, or missing chunks let drafts, insects, rain splash, or salt-laden air into the garage, or when the seal has shrunk, curled, or hardened so the door scrapes, leaves daylight gaps, or fails to sit flush. In Long Beach, UV sun, coastal salt air, and hot driveway concrete accelerate bottom-seal aging—often faster than inland areas—so visual cracks plus light gaps or water trails are enough reason to schedule replacement rather than waiting for a flooded garage. Bottom seals (astragals) wear first; side and top perimeter seals fail on different timelines and should be inspected separately. Light cleaning and reseating are DIY-friendly; cutting, fitting heavy T-style or bulb seals, correcting uneven floors, and any work near springs, cables, or track are pro jobs. Garage Door Repair Long Beach By On The Spot at 151 E 5th St, Long Beach, CA 90802 — (424) 310-0074.
Safe homeowner steps: with the door fully open and secured, look for daylight at the threshold, feel for stiff or crumbling rubber, note insect trails and damp floors after rain, photograph gaps, and avoid forcing a stiff door against a ruined seal. Call a pro when the floor is uneven, the seal retainer is bent, the door is off balance, or water is already entering living space through an attached garage.
What Cracked or Brittle Weather Seal Really Means on a Long Beach Garage
When homeowners say the garage door weather seal is cracked or brittle, they usually mean the bottom astragal—the rubber or vinyl sweep that should compress against the concrete—has lost flexibility. Instead of a soft squeeze that closes light and air gaps, the material feels hard, chalky, split, or crumbled at the ends.
Brittle seals often snap when flexed gently by hand. Cracked seals show longitudinal splits, corner tears, or missing sections where tires, dollies, or curb scrapes chewed the edge. Either condition breaks the continuous contact line that keeps out wind-driven rain, dust, spiders, and coastal salt mist.
Long Beach coastal exposure matters. Direct sun on west- and south-facing doors, reflected heat from light concrete, and salt air that never fully rinses inland combine to age elastomers faster than in cooler inland valleys. A seal that lasted a decade inland may need mid-life replacement here.
Not every gap is a dead seal. Uneven floors, settled slabs, debris under the door, warped bottom panels, and misadjusted travel limits can leave daylight even with new rubber. Diagnosis separates seal failure from floor geometry and door balance.
This guide focuses on cracked and brittle seals: how to recognize them, when replacement is urgent, how bottom seals differ from side and top weatherstripping, what DIY is safe, and when Garage Door Repair Long Beach By On The Spot should take over.
Technicians treat hardness and daylight together as primary evidence rather than waiting for catastrophic flooding.
Keep people and pets clear of the doorway while you inspect the threshold with the door fully open and locked out of automatic travel.
Document photos of cracks, end tears, and light lines for landlords, HOAs, and insurance notes after storm splash.
A brittle seal can still look mostly attached while failing its weather job every windy afternoon.
If chalk dust transfers to your fingers after a gentle flex, UV embrittlement is already advanced enough to justify replacement planning.
Why Long Beach UV, Sun, and Salt Air Age Garage Door Seals Faster
Long Beach UV and coastal salt accelerate weather-seal aging. Ultraviolet light breaks polymer chains in rubber and many vinyl compounds, turning flexible sweeps into stiff, chalky strips that crack at bends and ends.
Salt air carries chloride that settles on damp thresholds. Combined with sun heat, that film can embrittle surfaces and encourage corrosion on metal retainers that hold the seal in place.
Hot concrete radiates into the seal when the door sits closed on a summer afternoon. Repeated heat cycles dry oils from some rubber compounds and promote shrinkage that pulls ends away from jambs.
Marine-layer mornings add moisture; clear afternoon burn-off adds UV. That wet-dry-UV cycle is a known coastal wear pattern for door seals, patio furniture, and outdoor plastics alike.
West-facing Belmont Shore and Naples doors often see more direct evening sun on the closed seal face. Alley doors that bake over light concrete see bounce heat. Covered north exposures age more slowly but still fail from age and abrasion.
On The Spot routes from 151 E 5th St, Long Beach, CA 90802 routinely replace seals that look older than their calendar years specifically because coastal UV and salt compressed the useful life.
If your seal still looks new but feels rock-hard, UV embrittlement—not just visible cracks—is already present and replacement timing has arrived.
Rinse thresholds occasionally with fresh water after windy salt events, but do not soak openers, sensors, or electrical components—and never spray chemicals that attack rubber.
Tire abrasion on high-cycle family doors multiplies UV damage by grinding already-hardened surfaces into cracks sooner.
HOA complexes with shared western exposures often see clusters of brittle-seal tickets after the same hot summer—geometry and sun, not coincidence alone.
Drafts, Bugs, and Water Intrusion When the Bottom Seal Fails
A failed bottom seal opens three common complaint tracks: drafts, bugs, and water intrusion.
Drafts show as cool or hot air at ankle height, higher utility bills in attached garages that share walls with conditioned space, and dust lines that reappear days after sweeping.
Bugs and pests use the continuous gap at the ends—especially where seals shrink short of the jamb—as a highway for spiders, ants, and rodents seeking shelter. Cracked channels hold debris that invites nesting.
Water intrusion ranges from damp tire tracks after a street wash to standing water that reaches drywall, boxes, and HVAC equipment in an attached garage. Wind-driven rain on Long Beach storm days finds every gap under a curled seal.
Salt-laden splash adds corrosion risk to tool chests, bikes, and metal door hardware even when the volume of water looks small.
None of these alone prove the seal is the only culprit—clogged driveway grades, missing side seals, and roof leaks exist—but a cracked brittle bottom seal is the first easy win to eliminate.
Photograph water trails after the next rain and compare them to daylight photos at noon. Matching lines under the door strengthen the seal-replacement case.
If water reaches living space or electrical panels, treat urgency as higher than a comfort draft and schedule service promptly at (424) 310-0074.
Attached-garage households often notice bedroom wall mustiness before they notice the threshold gap—connect those clues.
Pest activity that returns within days of sweeping usually means the gap is still open, not that cleaning failed.
When to Replace: Clear Triggers for Cracked or Brittle Seals
Replace now when you see through-cracks, missing chunks, rock-hard rubber that will not flex, curled edges that no longer touch the floor, daylight across most of the opening, or recurring post-rain wet strips under the door.
Replace soon when ends have pulled short of the jambs, corners tear when the door closes, or the seal squeals and scuffs because it is too stiff to compress.
Replace as part of a broader tune when you are already correcting off-level floors with a threshold ramp, replacing a rotten bottom panel, or upgrading perimeter weatherstripping.
Waiting makes sense only when a same-week appointment is booked and interim risk is limited to mild drafts—not active flooding or pest infestation.
Do not wait for the seal to shred into the track or wrap around rollers. Debris in the track becomes a safety and damage problem beyond weatherproofing.
Home sale and rental turnover are natural replacement windows: buyers notice daylight, and landlords avoid first-week leak tickets.
Cost of a proper bottom-seal replacement is typically far below water damage, pest treatment, or energy waste over another season of denial.
If springs are broken or the door is off-track, those safety items come before cosmetic seal work—say so when you call.
Hairline cracks with hard feel still count—brittleness predicts sudden end tears on the next cold morning close.
If you already stuff towels under the door on windy nights, the replacement trigger has already been met.
Bottom Seal vs Side Seals vs Top Seal: Different Jobs, Different Failures
Bottom seals (astragals) are the soft sweep or bulb that meets the floor. They take abrasion, UV, salt splash, and compression every cycle. They fail first in most Long Beach homes.
Side weatherstripping runs vertically along the jambs. It brushes or compresses against the door face as panels travel. Failures look like torn vinyl flaps, missing nails, gaps at mid-height, and wind whistle on storm days.
Top seals or header weatherstripping close the gap at the upper jamb. Sun on south headers and bird nesting can damage them; they matter for dust and rain splash on windy days but see less tire abrasion.
Replacing only the bottom seal when sides are shredded leaves wind paths. Replacing sides while ignoring a cracked bottom leaves the flood path open. Inspect all three on every visit.
Materials differ: rubber bulbs, vinyl astragals, brush seals, and foam-backed stops. Coastal UV resistance and correct retainer fit matter more than brand stickers on the packaging.
Technicians measure retainer type (T-slot, U-channel, nail-on, slide-in) before promising a same-day match. Bring photos of the retainer ends when you call.
Side and top work may need door stops reset; bottom work may need floor cleaning and travel-limit recheck so the new seal compresses without crushing.
Garage Door Repair Long Beach By On The Spot inventories common coastal seal profiles so most cracked-brittle tickets finish without a second parts run.
Brush side seals help dust; bottoms usually need continuous elastomeric contact for water control.
A quiet bottom with screaming side whistle is a perimeter problem—do not buy three bottom seals hoping the sound vanishes.
Floor Contact Issues: Uneven Slabs, Gaps, and Seal Geometry
Floor contact issues explain many false seal failures. If the concrete dips in the middle or rises at one end, a straight seal cannot touch everywhere. Daylight remains after brand-new rubber is installed unless geometry is addressed.
Solutions include selecting a taller bulb or multi-fin seal, adding a threshold seal plate on the floor with drainage awareness, grinding high spots carefully, or accepting a planned slight compression increase within safe opener limits.
Never crank opener force to smash through a high floor hump. That risks entrapment protection problems and damages the new seal quickly.
Settled Long Beach slabs near older alley garages and coastal fill lots show this pattern often. Photos of light under the door at noon help the tech bring the right profile height.
Debris ridges—dried mud, cat litter, sand—also fake seal failure. Sweep and rinse the contact line before judging rubber.
If the door binds at one corner while the opposite corner floats, check track, hinges, and balance before blaming the astragal alone.
Threshold ramps can help water shed outward, but poor installs that reverse grade can trap water inside—another reason pros matter for drainage-sensitive attached garages.
After seal replacement, cycle the door and look for continuous compression without scraping metal on concrete.
Mid-span-only daylight strongly suggests a dip; end-only daylight suggests short or shrunk seals; continuous daylight suggests uniformly failed rubber or high travel stop.
Crown in the middle can crush the seal center while ends float—photograph both conditions for the technician.
DIY-Friendly Weather Seal Tasks vs When to Call a Pro
DIY-friendly tasks include visual inspection with the door fully open, photographing cracks and daylight, gently cleaning the threshold, wiping dirt from the seal face, and confirming whether side and top strips are intact.
Some experienced homeowners can slide a replacement astragal into a healthy metal retainer if they match the profile exactly, cut carefully, and keep clear of springs and live opener travel. Mistakes include wrong profile, short cuts, twisted fins, and leaving ends that snag.
Call a pro for bent or corroded retainers, rotten bottom sections, off-balance doors, broken springs, cable issues, sensor interference near the floor, uneven floors needing judgment, commercial high-cycle doors, and any situation where the door must be partially disassembled.
Safety first: garage door springs and cables store dangerous energy. Weather-seal work should never become an excuse to loosen spring hardware.
CPSC guidance on automatic residential garage door operators reminds homeowners that opener safety systems must remain functional after any door work—including seal swaps that change closing resistance.
DASMA system safety tips frame the door as a complete system: seals, tracks, springs, and operators interact. A stiff new seal on a poorly balanced door creates new problems.
If you already started a DIY swap and the door will not close fully or sensors trip on the thicker seal, stop and call (424) 310-0074 rather than defeating sensors.
On The Spot prefers finishing partial DIY jobs safely over shaming—bring the leftover seal and receipt so profile matching is faster.
Videos that skip retainer matching and reverse testing are incomplete for Long Beach coastal conditions.
When in doubt, inspection-only DIY plus a pro install is cheaper than a damaged bottom panel from a failed experiment.
Field Inspection Flow: Cracked Seal to Replacement Decision
Use this field flow when you suspect a cracked or brittle garage door weather seal. Keep the door fully open and clear of automatic travel; keep people and pets away from the path.
- Daylight check: From inside with lights off or at night, look for continuous light under the door. Note end gaps vs mid-span gaps.
- Flex test: With door open, gently flex a corner of the bottom seal. Crumble, chalk dust, or snap means brittle failure.
- Crack map: Photograph splits, missing chunks, and curled edges. Mark ends that no longer reach the jambs.
- Floor scan: Sweep the contact line. Note dips, ridges, and standing water stains.
- Perimeter scan: Check side and top weatherstripping for tears and missing fasteners.
- Water / pest history: Log recent rain intrusion, bug trails, and draft complaints.
- Safety glance: If springs look broken, cables frayed, or door crooked, stop DIY and call a pro first.
- SCE context: If odd opener behavior coincided with neighborhood power events, check the SCE Outage Center—then still address the seal if daylight and cracks remain.
- Call a pro: Share photos, retainer type if known, and whether water entered. Ask for bottom seal replacement plus perimeter inspection and a reverse check after close-limit adjustment.
This flow separates seal failure from floor geometry, balance issues, and power coincidences so the repair matches the cause.
Symptom Comparison Table: Brittle Seal vs Floor Gap vs Side Seal vs Opener Issue
Use this table when your garage door weather seal looks cracked or brittle. Match clues before buying random rubber online or defeating safety sensors to force a close.
| Clue | Likely Layer | Homeowner Safe Step | Pro Step |
|---|---|---|---|
| Rubber hard, chalky, snaps when flexed | Brittle UV-aged bottom seal | Photo; schedule replace | Match profile; replace astragal |
| Visible cracks / missing chunks | Failed bottom seal | Keep debris out of track | Replace seal; check retainer |
| Daylight only at mid-span dip | Uneven floor geometry | Photo light line | Taller seal / threshold plan |
| Daylight at both ends; seal short | Shrunk or wrong-length seal | Measure opening width | Cut/fit correct length |
| Wind whistle at jambs; bottom looks OK | Side weatherstripping | Inspect vertical stops | Replace side seals |
| Wet floor after rain under door | Bottom seal + grade / splash | Log storm photos | Seal + drainage review |
| Bugs at corners nightly | End gaps / cracked channels | Do not poison tracks | Seal ends; perimeter tune |
| New seal scrapes; door reverses | Travel limits / balance | Do not bypass sensors | Adjust limits; verify reverse |
| Fails during SCE outage week too | Power co-factor possible | Check SCE outage center | Opener + seal full check |
| Sensors unplugged so door closes past thick seal | Unsafe bypass present | Stop using defeated setup | Restore sensors; reseal properly |
Brief technicians with your matching rows. Keep CPSC and DASMA safety boundaries visible while you chase drafts and rain.
Seal Materials and Profiles: Rubber, Vinyl, Bulb, and Brush Options
Common residential bottoms include U-shaped vinyl astragals, rubber bulbs, multi-fin designs, and some brush hybrids. Each compresses differently against concrete and uneven floors.
Rubber often stays flexible longer in moderate climates but still UV-ages on Long Beach west exposures. Vinyl can be cost-effective and slide easily into retainers but may harden and crack in sun.
Bulb seals help bridge modest dips. Overly tall bulbs on flat floors can increase close resistance—limits and balance must be verified after install.
Brush seals shine for dust control on sides; bottoms usually need a continuous elastomeric contact for water.
Retainer compatibility is non-negotiable. A beautiful seal that does not lock into your T-slot becomes a driveway souvenir on the first open cycle.
Coastal-rated compounds and UV inhibitors are worth asking about. Cheap leftovers without UV resistance recreate the brittle problem early.
Color is mostly cosmetic; black remains common for UV reasons. Matching paint is less important than continuous compression.
Ask your technician which profile they recommend for your floor photograph and why—not only what was on the truck.
Multi-fin designs can tolerate slight unevenness better than flat single flaps on many Long Beach alley slabs.
Commercial high-cycle doors may need different abrasion ratings than residential soft vinyl—tell dispatch if the door is shared or high-use.
False Fixes That Waste Time When the Weather Seal Is Cracked
False fixes waste money and sometimes create danger. Stuffing towels, foam pipe insulation, or weather tape under a closed door is not a seal replacement and can interfere with sensors and reverse behavior.
Caulking the door to the floor traps the door shut and damages finishes—never do that.
Ordering a random online astragal without measuring retainer type leads to returns and half-installed flaps that tear on the first cycle.
Cranking opener force to crush a stiff brittle seal does not restore flexibility and can worsen impact risk—contrary to safe automatic operator practice highlighted in CPSC consumer FAQs.
Spraying silicone endlessly on a cracked seal may quiet squeaks briefly but will not close splits or restore missing chunks.
Ignoring side seals while replacing only the bottom can leave wind-driven rain paths that look like a failed new bottom seal.
Bypassing photo eyes because a thick DIY seal trips them is the most dangerous false fix—restore optics and adjust travel properly instead.
Waiting for one more rainy season after daylight is visible often costs more in water damage than the seal visit.
Shims stacked under a closed door create trip hazards and teach nothing about the real gap geometry.
Painting cracked rubber to hide chalking accelerates failure and voids any chance of clean compression.
Red Flags: Stop DIY and Schedule Weather Seal Service
Stop DIY and schedule service when the retainer is bent or corroded through, the bottom panel is rotten or delaminating, springs are broken, cables are frayed, the door is off-track, the door feels heavy or crooked, water is entering living space, or anyone suggests defeating sensors to close over a fat new seal.
Also stop if cutting the seal requires standing on unstable objects under an open door, if electrical smell appears at the opener, or if the door drops hard when disconnected.
Rental and HOA units should document daylight and water photos before and after replacement for turnover files.
Call (424) 310-0074 for Garage Door Repair Long Beach By On The Spot when red flags appear.
Coastal brittle seals are common; unsafe improvisation is not acceptable.
If mold appears on drywall from repeated splash, treat seal replacement as part of a moisture response—not a cosmetic afterthought.
Red flags override wait-until-weekend thinking—especially when bypass is already present.
Keep people and pets clear of the doorway while you wait for service.
A door that reversed into a bunched seal and nearly struck a pet is out of service until verified.
Frayed lift cables spotted during a seal peek mean the seal appointment becomes a safety appointment first.
Professional Replacement Path for Cracked or Brittle Weather Seals
A professional path typically includes interview for drafts, bugs, and water history; daylight and flex inspection; retainer identification; floor geometry review; side and top perimeter check; removal of the failed seal; cleaning of the channel; installation of a matched profile cut to length; end finishing; travel-limit verification so the new seal compresses without reverse trips; and mandatory reverse and entrapment checks after work.
Technicians may recommend threshold plates or taller bulbs when dips are real, and may refuse force increases as a substitute for geometry.
Wiring and sensor clearance near the floor are checked so a fatter seal does not become a chronic photo-eye complaint.
You should receive plain-language findings: brittle UV failure, abrasion tear, wrong prior profile, floor dip, or mixed.
Authority-aware shops keep CPSC reverse expectations and DASMA system framing in mind—and may note SCE outage coincidence when opener oddities traveled with seal complaints.
On The Spot path is diagnosis-first, safety-intact, and coastal-aware—not parts roulette from unmatched bags.
Ask for before and after daylight expectations and whether sides should be replaced in the same visit.
Keep old defeated jumpers out of the garage; do not leave bypass hardware just in case the new seal feels thicker.
Good techs show you the old seal flex test versus the new seal flexibility so the UV story is tangible.
Expect the visit to include a clean threshold—grit left in the channel foreshadows early abrasion on new rubber.
Maintenance Habits That Extend Weather Seal Life in Long Beach
Sweep the threshold regularly so grit does not grind the seal. Rinse salt film after windy coastal events without flooding the opener.
Avoid parking so tires scrub the seal sideways on every exit. Teach household members not to drag sharp dollies across the astragal.
Inspect flex and daylight each season—especially before fall rain and after summer UV peaks.
Do not paint the seal. Paint cracks and accelerates failure. Keep overspray off rubber when painting jambs.
Lubricate rollers and hinges per door care guidance, but keep petroleum products off rubber seals unless the product is seal-safe.
Trim plants that hold moisture against side seals. Clear wasp nests from header weatherstripping carefully.
Test reverse monthly with a soft roll under the door path per common safety guidance—never with a person as the test object. After seal work, retest.
Battery backup openers still need honest seals and honest sensors. Power resilience does not equal weatherproofing.
Small habits prevent the every-storm-wet-floor cycle that Long Beach attached garages know too well.
Log the first daylight sighting each year as a cue for a tune visit rather than waiting for soaked cardboard boxes.
Replace Now vs Waiting When the Seal Is Only Slightly Cracked
Waiting is tempting when cracks are hairline and no rain is forecast. The risk is sudden end tears, pest entry during warm nights, and the first wind-driven storm that finds the gap.
Replace now when daylight is continuous, rubber is hard, water already entered, or pests are established at the corners.
Waiting is more reasonable only when a same-week appointment is booked and interim risk is mild drafts—without sensor bypass and without blocking the door with towels.
If last winter was wet inside, schedule seal service before this winter first atmospheric river pattern.
Property sale and rental turnovers should not transfer a known daylight gap undocumented.
Cost of a proper seal visit is usually far below drywall repair, pest treatment, or rusted tool replacement.
Slight cracks that coexist with a rotten bottom panel mean the panel conversation belongs in the same visit—not a delay.
Technicians treat early brittle feel as actionable even before dramatic shredding appears.
Calendar reminders after peak summer UV catch many Long Beach seals before the first autumn rain.
If household members already argue about just stuffing a towel, the social trigger for replace-now has fired.
Same-Day Help When a Failed Seal Lets Rain or Pests Into the Garage
Same-day help matters when rain is entering, when pests are active, when a DIY seal jammed the door, when sensors were defeated to force a close, or when travel plans require a secure weatherproof garage.
Call (424) 310-0074 and mention cracked or brittle weather seal so dispatch can plan profiles and retainer hardware.
Share photos of the seal ends, daylight, and any water trails. Videos of the close cycle help if the door reverse-trips on the old curled rubber.
If the door is off-track or springs are broken, say so—those override a pure seal ticket for safety sequencing.
Garage Door Repair Long Beach By On The Spot routes from 151 E 5th St, Long Beach, CA 90802 across Long Beach neighborhoods and nearby communities.
Do not create a DIY bypass just for tonight. Park outside and wait for honest sensors and a proper seal if needed.
Ask the arriving tech to verify reverse after seal replacement—same-day speed should not skip safety checks.
Bring leftover mismatched seals from prior attempts so the correct profile is identified faster.
Mention attached-garage moisture reaching living space so urgency is clear in dispatch notes.
Gate codes and alley access notes prevent wasted minutes while rain continues under a failed seal.
Questions to Ask Before Hiring for Weather Seal Replacement
- Will you inspect bottom, side, and top weatherstripping—not only the cracked bottom seal?
- Do you match retainer profiles on site, and what options exist for uneven floors?
- Will travel limits and reverse/entrapment protection be tested after the new seal is installed?
- How do you distinguish seal failure from slab dips and door balance problems?
- What UV- and salt-aware materials do you recommend for Long Beach exposures?
- Can you replace bent retainers or advise on rotten bottom panels in the same visit?
- Do you refuse bypass requests if a thicker seal interacts with photo eyes?
- Can you review SCE outage coincidence without ignoring obvious daylight gaps?
- What maintenance should I do between visits for threshold cleaning and seasonal checks?
- How should I document before/after daylight for landlord, HOA, or insurance records?
Good answers sound specific. Vague we-will-put-some-rubber-on replies without mentioning retainers, floors, and reverse tests are a yellow flag for this symptom pattern.
Why Garage Door Repair Long Beach By On The Spot for Weather Seal Problems?
Garage Door Repair Long Beach By On The Spot treats cracked and brittle weather seals as a coastal materials problem first: UV, salt, abrasion, and floor geometry—while still checking balance, retainers, sides, tops, and opener safety. We serve homeowners, renters (with permission), landlords, property managers, HOAs, and small businesses from 151 E 5th St, Long Beach, CA 90802.
We keep safety non-negotiable. CPSC and DASMA-aligned practice means we verify reverse after seal work rather than defeating sensors when a thicker profile changes closing feel. SCE outage context is used when timing suggests power co-factors, without ignoring a daylight gap under the door in plain sight.
Coastal experience matters: west-sun embrittlement, salt splash, uneven alley slabs, and storm-driven rain under curled seals show up on our Long Beach routes constantly.
Call (424) 310-0074, visit https://longbeachcagaragedoorrepair.com/, or map us at Google Maps.
Diagnosis First
Daylight, flex, floor dips, and perimeter seals before random rubber swaps.
Safety Intact
No bypass. Limits and reverse verified after seal replacement.
Local Coastal Fit
UV, salt, and Long Beach slab realities built into profile choice.
Areas Served From the Long Beach Location
Garage Door Repair Long Beach By On The Spot serves Long Beach neighborhoods and nearby communities from 151 E 5th St, Long Beach, CA 90802, including downtown Long Beach, Belmont Shore, Belmont Heights, Naples, Alamitos Beach, Bixby Knolls, California Heights, Wrigley, Traffic Circle, El Dorado Park area, Lakewood borders, Signal Hill, and adjacent Los Angeles County pockets along regular routes. Cracked and brittle weather-seal tickets appear often on west- and south-facing doors, sun-baked alley thresholds, and attached garages after wind-driven rain.
Call (424) 310-0074 with gate codes, seal photos, daylight videos, and whether water entered. Website: https://longbeachcagaragedoorrepair.com/. Maps: https://www.google.com/maps?cid=5381478035707257267.
Provide reserved stall notes and whether a prior technician defeated sensors after a thick DIY seal. Condo P-levels may need escort. Rental turnovers should include a daylight check and reverse demonstration before new occupants arrive.
Google Map Location
Find Garage Door Repair Long Beach By On The Spot at 151 E 5th St, Long Beach, CA 90802. Use this Google Maps link for directions and business details: https://www.google.com/maps?cid=5381478035707257267.
Phone (424) 310-0074 before visiting if you need to discuss a cracked brittle seal letting rain or pests into the garage. Most profile matching and floor-geometry decisions are diagnosed at your garage rather than at a counter drop-off.
Bring seal-end photos, daylight clips, retainer close-ups, and any prior mismatched DIY seals to any conversation—phone, web contact, or on-site.
FAQs About Cracked or Brittle Garage Door Weather Seals
These answers target common Long Beach questions when a garage door weather seal is cracked or brittle. Use them with the comparison table—not as a substitute for on-site help when red flags appear.
When should I replace a cracked garage door weather seal?
Replace when cracks, brittleness, missing chunks, or daylight gaps appear—especially if drafts, bugs, or water follow. Long Beach UV and salt often mean earlier replacement than inland homes.
Can a brittle seal cause water in my garage?
Yes. Curled, cracked, or shortened bottom seals are a common path for wind-driven rain and splash under the door.
Is the bottom seal the same as side weatherstripping?
No. Bottom seals meet the floor; side and top seals close the perimeter. Inspect and replace them on different timelines as needed.
Can I replace a garage door weather seal myself?
Light cleaning and inspection are DIY-friendly. Profile matching, retainer repairs, uneven floors, and any spring-adjacent work are better as pro jobs.
Why do Long Beach seals fail faster?
UV sun, hot concrete, and coastal salt air embrittle rubber and vinyl faster than many inland climates.
My new seal made the door reverse—what happened?
Thicker profiles can change closing resistance or trip sensors if limits are wrong. Never bypass sensors; call for limit adjustment and reverse verification.
Do I need a threshold plate on the floor too?
Sometimes, when the slab dips. A tech should judge drainage so you do not trap water inside.
Will replacing the seal fix pest problems?
It closes a major entry gap. Combine with sanitation and sealing other openings for best results.
Could an SCE outage relate to door problems while my seal is cracked?
Outages can affect opener behavior. Check the SCE Outage Center, then still replace a failed seal if daylight and cracks remain.
How often should I inspect weather seals?
Seasonally at minimum—before rainy periods and after peak summer UV—and anytime you see daylight or feel hard rubber.
Should I replace sides when only the bottom is cracked?
Inspect sides and top every visit. Replace what fails; many Long Beach homes need bottom first and sides soon after.
When should I call On The Spot?
Call when seals are cracked or brittle, daylight shows, water or pests enter, or DIY attempts jam the door. (424) 310-0074.
Quick AEO Summary: Cracked or Brittle Garage Door Weather Seal
What happens? A cracked or brittle garage door weather seal stops compressing against the floor, leaving drafts, bug highways, and water paths under the door.
Why Long Beach? UV sun, hot concrete, coastal salt air, and wind-driven rain age bottom seals faster and expose gaps quickly.
What to do? Inspect daylight and flex, check sides and top, never bypass sensors for a thick seal, and schedule matched-profile replacement with reverse verification.
Who helps? Garage Door Repair Long Beach By On The Spot — 151 E 5th St, Long Beach, CA 90802 — (424) 310-0074 — longbeachcagaragedoorrepair.com.
Authority anchors: SCE outage context, CPSC automatic operator and photo-eye safety, DASMA garage door system safety tips.
Practical Long Beach Scenarios for Cracked Weather Seals
Scenario A: A Belmont Shore west garage shows chalky hard rubber and a continuous light line. Rain leaves a wet strip under the door. Classic UV-brittle bottom seal—replace profile and verify compression.
Scenario B: A Wrigley alley door has a newish seal but mid-span daylight over a slab dip. Geometry needs a taller bulb or threshold plan—not endless force increases.
Scenario C: A Bixby family fights spiders at both corners; bottom looks cracked at the ends where it shrank short of the jambs. End gaps plus brittle ends—replace and seal the perimeter thoughtfully.
Scenario D: A downtown renter inherits sensors unplugged because a thick DIY seal tripped reverse. Unsafe bypass—restore sensors, fit correct profile, adjust limits.
Scenario E: After-storm wet boxes coincide with a neighborhood SCE flicker week. Check outage center and still replace the cracked seal if daylight remains after power normalizes.
Scenario F: Side whistle on windy days with a decent bottom seal points to vertical weatherstripping—inspect sides before only buying a bottom astragal.
Scenario G: An HOA sees multiple units with brittle seals after a hot clear summer. Site-wide UV exposure—unit-by-unit replacements beat silent towel-stuffing culture.
Scenario H: A Signal Hill adjacent home gets wind-driven rain under curled rubber despite a mild looking crack map. Wind plus curl equals replace now, not wait.
These scenarios are composites of common Long Beach patterns written to teach recognition. Bring the scenario letter that matches you when you call (424) 310-0074 so dispatch hears the right parts list.
Scenario I: A Lakewood-border family with daily dual-car cycles abrades a sun-hardened seal into missing chunks within two summers—high cycle plus UV stacks.
Scenario J: An Alamitos attached garage shows indoor hallway humidity spikes after every rain—threshold seal failure plus inward slab tip—needs seal and drainage judgment together.
Myths About Garage Door Weather Seals
Myth: If the door closes, the seal is fine. Truth: doors close over hard cracked seals while daylight, drafts, and pests continue.
Myth: Any rubber from the hardware store will fit. Truth: retainer profile and length matching matter; wrong seals tear out or leave gaps.
Myth: Caulk the door to the floor for rain season. Truth: that traps the door and damages finishes—replace the seal instead.
Myth: Crank opener force to crush a stiff seal. Truth: force is not a substitute for flexible rubber and can increase impact risk.
Myth: Only bottoms matter. Truth: sides and tops fail too and should be inspected every visit.
Myth: Coastal air does not affect indoor-facing seals. Truth: closed doors still bake in sun and take salt splash at the threshold.
Myth: Unplugging sensors is OK if a new seal is thick. Truth: bypass is unsafe and contrary to CPSC and DASMA safety framing.
Myth: One silicone spray restores brittle rubber. Truth: embrittled polymers need replacement, not perfume.
Myth: Waiting until the seal shreds saves money. Truth: water and pest costs usually exceed timely replacement.
Myth: Uneven floors mean seals are pointless. Truth: profile height and threshold strategies often restore useful contact.
Homeowner Call Script for Weather Seal Service
Use this script when calling (424) 310-0074 so the visit starts with the right diagnosis frame:
Hi, my garage door weather seal is cracked or brittle. I see daylight under the door and drafts, bugs, or water after rain. The rubber feels hard and snaps, crumbles, or has missing chunks. Side and top seals look OK or torn. Floor looks flat or dipped. Sensors have not been bypassed—or have been, if that is true. Address is in my neighborhood. Gate code if any. Please help with matched seal replacement, perimeter check, and a reverse test after any limit adjustment.
Add whether the garage is attached, whether living-space moisture appeared, and whether a prior DIY seal is still half-installed.
Ask whether the tech can bring common T-slot and bulb profiles for coastal homes. Share photos of retainer ends.
Keep the SCE note ready if outages coincided: you already checked https://www.sce.com/outage-center and still see daylight and brittle rubber afterward.
Clear, concise facts get faster correct parts on the truck—profiles, retainers, threshold options—and reduce the chance of a second trip.
Glossary: Weather Seal Terms in Plain Language
Bottom seal / astragal: The rubber or vinyl sweep along the door bottom edge that should compress against the floor.
Brittle seal: Aged material that has hardened and lost flexibility, often from UV and heat, and may crack or snap when flexed.
Retainer / channel: The metal or vinyl track that holds the seal; profile must match the replacement.
Side weatherstripping: Vertical seals along the jambs that brush or compress against the door face.
Top / header seal: Weatherstripping at the top of the opening that closes the upper gap.
Daylight gap: Visible light under or beside the closed door indicating incomplete seal contact.
Threshold seal: A floor-mounted strip or ramp used to improve contact and shedding on uneven slabs.
Bulb seal: A rounded hollow profile that compresses to bridge modest floor irregularities.
Travel limits: Opener settings that control how far the door travels open and closed; often rechecked after seal changes.
Reverse / entrapment protection: Safety behavior that stops or reverses a closing door when sensors or contact indicate a problem—never bypass for seal convenience.
UV embrittlement: Sun-driven hardening and cracking of polymers common on Long Beach exposures.
Perimeter seals: Collective term for bottom, side, and top weatherstripping as a weather and pest barrier system.
Weather Seal Anatomy: Astragal, Retainer, Ends, and Compression Line
Weather seal anatomy for cracked-brittle diagnosis includes the elastomeric sweep or bulb, internal fins or chambers, the retainer channel on the bottom panel, end plugs or unfinished ends, and the continuous compression line against concrete.
When UV hardens the polymer, fins stop folding and contact becomes intermittent. Cracks open channels for water. Missing end material creates pest highways at the jambs.
Retainers bend from impacts and corrode in salt air. A healthy seal in a twisted retainer still leaves gaps. Pros often straighten or replace retainers during the same visit.
Compression should be even enough to block light without requiring unsafe opener force. After install, a tech watches the close cycle for bunching, scraping metal, and sensor clearance.
Side and top anatomy differs—nail-on stops, brush piles, vinyl flaps—but the same idea applies: match the part to the job and verify system safety afterward.
Understanding anatomy keeps conversations precise: replace the brittle astragal, clean the channel, square the retainer, verify daylight, prove reverse—not max the force settings.
Wire and sensor clearance near the floor remain part of the doorway anatomy. A seal story that also shows LED dropout may be a combined ticket.
After any anatomy-level repair—new seal, new retainer, threshold—finish with daylight checks and a reverse demonstration with the path clear.
End finishing matters more than homeowners expect; a perfect mid-span seal with short ends still invites corner pests.
Internal multi-chamber bulbs can hide early cracks until water fills chambers—flex and daylight beat visual-only checks.
Deep Dive: UV Embrittlement, Chalking, and Coastal Heat Cycles
UV embrittlement is the primary reason Long Beach bottom seals turn chalky and snap. Photodegradation shortens polymer chains; plasticizers migrate; the surface powders; flex becomes fracture.
Heat cycles from driveway concrete amplify the damage. A closed door on light-colored concrete can cook the seal face for hours after peak sun.
Salt films hold moisture against microcracks, then dry into abrasive crusts that grind on every open cycle.
West and south exposures see more direct beam hours. Covered north doors still age from ambient UV and ozone but usually slower.
Replacement timing should track feel and daylight, not only calendar years. A five-year-old coastal seal can outperform a neglected three-year-old sun-baked one—or the reverse.
Storage of spare seals matters for pros: UV-safe storage keeps truck inventory flexible. Homeowners should not leave replacement rubber on a sunny dashboard for a week before install.
Paint and solvents accelerate embrittlement. Keep them off seals during DIY projects.
Document chalk dust on the hands after a flex test—it is a simple clue for landlords reviewing work orders.
Seasonal inspection before fall rains catches UV damage from summer before the first wind-driven storm.
Professional coastal service assumes UV is guilty until flex proves otherwise—then still checks floors and sides.
Deep Dive: Wind-Driven Rain, Splash Paths, and Attached Garage Moisture
Wind-driven rain in Long Beach does not fall politely straight down. It rides under curled seals, through end gaps, and along slab slopes that tip inward from settlement.
Splash from driveway runoff and street wash adds volume even on moderate rain days. A brittle seal that looked fine in August fails the first October event.
Attached garages share walls and sometimes HVAC paths with living space. Moisture under the door can raise indoor humidity, feed mold in corners, and rust stored items.
Photograph water lines immediately; they evaporate and arguments begin. Timestamped photos help insurance and landlord files.
Seal replacement is necessary but not always sufficient. Gutters dumping at the threshold, reverse driveway grades, and missing side seals can keep floors wet.
Threshold plates must respect drainage. A plate that dams water inside is a false fix. Pros aim water outward when geometry allows.
Electrical panels, washers, and water heaters on garage floors raise the stakes. Treat intrusion near utilities as urgent.
After replacement, test with a hose carefully at the threshold without spraying openers or sensors, or wait for the next rain and re-photo.
Pest activity often spikes when wet cardboard and gaps coincide—another reason to close the seal gap promptly.
Household safety includes slip risk on wet garage floors—another practical reason not to normalize chronic intrusion.
Deep Dive: Safe DIY Limits and Common Profile Mistakes
Safe DIY limits for weather seals are narrow: inspect, photo, clean, and maybe slide a correctly matched astragal if the retainer is healthy and the door is safely secured open.
Common mistakes include buying by length only without retainer type, cutting too short, installing fins upside down, leaving excess that bunches into sensors, and forcing thick bulbs on doors with marginal balance.
Never disconnect springs or remove bottom brackets to change a seal unless you are a trained technician. Those steps are outside homeowner DIY.
If the door must be manually lifted and feels very heavy, stop—springs may be failing and seal work can wait until balance is safe.
Use non-metal tools carefully around retainers to avoid slicing remaining seal material into the channel.
After any DIY attempt, verify daylight reduction and perform a careful close with people clear. If reverse trips, call a pro rather than defeating sensors.
Keep receipts and leftover profile scraps for the technician if you abort mid-job.
Online videos that skip retainer matching and reverse testing are incomplete for Long Beach coastal conditions.
HOA rules may restrict exterior-visible side seal styles; check before DIY aesthetics experiments.
When in doubt, inspection-only DIY plus a pro install is cheaper than a damaged bottom panel from a failed experiment.
Deep Dive: Slab Dips, Crown, and Choosing Seal Height
Slab dips and crowns are the silent partners of seal complaints. A perfectly flexible new seal cannot invent concrete that is not there.
Measure mid-span daylight vs end daylight. Mid-only gaps suggest dips; end-only gaps suggest short seals or raised corners; continuous gaps suggest uniformly failed rubber or high travel stop.
Taller bulbs and multi-fin designs buy millimeters of compliance. Extreme dips may need threshold systems or concrete work beyond a seal ticket.
Opener travel should bring the door to firm seal compression without hammering the slab. Limits and force are adjusted by pros with experience—not by maxing dials.
Crown in the middle can crush the seal center while ends float—another geometry pattern seen on some poured floors.
Alley Long Beach slabs with long settlement histories deserve photos from both ends and the center before parts are chosen.
Do not grind concrete casually near utilities or coated floors without understanding dust and coating damage.
After height changes, recheck photo-eye beams so a taller seal does not occupy the optical corridor incorrectly—rare but possible with debris piled on seals.
Document geometry for the next technician so seasonal revisits do not restart from zero.
Floor honesty prevents blaming premium seals for problems they cannot solve alone.
Deep Dive: Reverse Tests After Weather Seal Replacement
After weather seal replacement, safety tests matter as much as a dark threshold. With the path clear and people clear, confirm the door closes with even compression.
Perform a beam-break reverse: safely interrupt the photo-eye beam during close and confirm reverse. Never use a person or pet as the test object.
Confirm contact reverse behavior remains appropriate on a soft non-damaging test object per common safety practice. Seal work does not excuse ignoring force response.
If a thicker seal was required for a dip, ensure sensors remain clear and brackets remain secure after several cycles.
Document results for landlords and HOAs: daylight before/after, seal profile used, and reverse result. Paper trails prevent repeat bypass temptations.
If tests fail, do not leave the site with a defeated sensor workaround. Continue diagnosis—limits, balance, wire, or still-insufficient geometry may remain.
Teach household members the new normal: sensors stay connected; call if drafts return; do not normalize towels under the door.
Battery backup openers still need the same optical and contact tests. Power resilience during outages does not equal weatherproofing or entrapment protection.
Keep CPSC-oriented caution visible in every test conversation: photo-eye and entrapment protection are why thicker seals must be commissioned carefully.
DASMA system framing reminds everyone that seals, springs, tracks, and operators succeed or fail together.
Deep Dive: Insects, Rodents, and Corner Gaps at Failed Seals
Corner gaps at failed seals are pest freeways. Spiders favor the sheltered crack lines; ants follow moisture; rodents test any soft gap near food storage.
Brittle seals with longitudinal cracks create mini-channels that look closed from a distance but read as tunnels at insect scale.
Replacement should include finishing ends snugly without creating trip hazards or binding the door.
Do not flood insecticide into tracks and retainers—residues attract dirt and can degrade some materials. Mechanical exclusion via good seals comes first.
Side seal tears at mid-height are secondary pest paths on windy nights when doors sit closed.
Pet food in garages raises pressure to close gaps quickly. Schedule seal service rather than relying on traps alone.
After seal work, clean the threshold so old nesting debris does not simply move next door.
HOA and rental units should note pest history in the work order so techs prioritize end sealing details.
If rodents chewed sensor wires while exploiting a seal gap, say so—combined tickets need both trades of attention.
Exclusion plus sanitation beats either alone when Long Beach garages sit near alleys and palms.
Deep Dive: Drafts, Attached Garages, and Comfort Costs
Drafts under a failed seal pull conditioned air from living spaces through shared walls, ducts, and leaky man-doors. Homeowners feel cold floors and higher bills without always blaming the garage threshold.
Closing the bottom gap is one of the highest comfort returns per dollar in an attached garage weatherization stack—alongside man-door weatherstripping and sealing penetrations.
Brittle seals that look closed still leak when fins no longer spring back after compression.
Infrared camera optional hobbyists sometimes see ankle-height plumes at the threshold; daylight photos are enough for most decisions.
Do not expect a garage seal alone to match insulated living-room performance; expect fewer drafts and cleaner floors.
EV charging and workshop hobbies make garage comfort more noticeable year-round in Long Beach mild swings.
After replacement, reassess whether side seals and the house-to-garage door need attention for a complete draft package.
Energy motives should never justify defeating safety sensors or over-forcing doors.
Landlords can market sealed garages as a quality detail in coastal rentals prone to dust and salt film.
Track subjective draft notes before/after—they pair well with daylight photos in service records.
Deep Dive: Retainer Types, Corrosion, and When the Channel Must Be Replaced
Retainer types include nail-on aluminum, slide-in T-slots extruded on bottom sections, screw-affixed U-channels, and specialty commercial tracks. Matching the seal tongue to the channel is mandatory.
Coastal corrosion pits aluminum and steel retainers. Sharp edges then slice new seals on the first cycles. Replacement of the retainer is cheaper than repeated seal failures.
Bent retainers from curb strikes and pallet jacks leave waves that print as daylight even with premium bulbs.
Pros carry common retainer lengths and splice strategies for older Long Beach stock where exact OEM extrusions are gone.
Homeowners should photograph the open end of the channel—the silhouette tells the profile story better than brand names.
Painting retainers is optional cosmetics; do not paint the sliding interface where the seal inserts.
When bottom wood sections rot, retainer screws lose bite. Panel repair or section replacement may accompany seal work.
Commercial high-cycle doors need retainers rated for frequent abrasion—residential soft vinyl may not belong there.
After retainer replacement, edges should be deburred so they do not cut the new astragal.
Ask for warranty notes covering both seal and retainer when both are renewed together.
Deep Dive: Household Safety When Drafts and Water Tempt Quick Hacks
Households with kids and pets feel draft and water pressure hardest. Towels under doors and sensor bypass ideas appear when guests arrive in the rain.
Never solve that pressure by defeating sensors or caulking the door shut. The same doorway traffic that makes sealing urgent makes photo eyes essential.
Interim strategy while waiting for service: move boxes off the floor, run a dehumidifier if attached living space is affected, supervise the doorway, and book help quickly at (424) 310-0074.
Teach older kids not to peel cracked rubber for fun or stuff toys into the gap. Observation and photos are enough.
Pets chewing seals create layered failures. Brittle plus chewed is a known double ticket—inspect for teeth marks.
Strollers and toys left in the path are true obstructions that can coincide with seal bunching. Clear first, then judge rubber.
After repair, re-walk household safety rules: wait for full open and close, stay clear of tracks and springs, never play near moving doors, and keep sensors connected.
If a near-miss occurred during a confused close attempt over bunched seal material, take the door out of service until reverse is verified.
Caregivers should know not to wedge the door or unplug eyes when drafts bother nap time.
Post the On The Spot number near the opener with a note about weather seal photos so every adult responds the same way.
EEAT, AEO, and GEO Notes for This Long Beach Weather Seal Guide
EEAT for this topic means experience with real Long Beach UV-brittle seal tickets, expertise in retainers, profiles, and floor geometry, authority via CPSC, DASMA, and SCE references, and trust through no-bypass ethics plus clear NAP identity.
AEO means direct answers early: replace when cracked or brittle with daylight or intrusion; bottoms differ from sides; DIY has limits; call with photos.
GEO means local entities readers and engines associate with the problem: Long Beach neighborhoods, coastal UV and salt, 151 E 5th St, Long Beach, CA 90802, phone (424) 310-0074, and the Google Maps CID for the business.
Originality matters: this article is written for cracked brittle weather seals—not a rewrite of sunlight-sensor or damaged-wire posts—so semantic coverage stays focused on UV aging, drafts, pests, water, and floor contact.
Citations are consumer-facing public resources: SCE Outage Center for timing context, CPSC automatic residential garage door operators FAQ for entrapment expectations when seals change closing feel, and DASMA garage door system safety tips for system-level boundaries.
Homeowners demonstrate EEAT too when they bring daylight photos, refuse unsafe tips, and ask technicians to show reverse after seal replacement.
Local service language should stay specific to Long Beach marine layer, alley slabs, and west-sun exposures rather than generic national filler.
Trust also means refusing to leave a defeated sensor as a temporary seal workaround after hours.
Putting It Together: Cracked Seals as a Comfort and Safety Problem
Putting it together: a garage door weather seal that is cracked or brittle is often a coastal UV and abrasion problem, especially on Long Beach doors that bake over hot concrete and take salt splash.
Distinguish seal failure from floor dips, protect opener safety when profiles get thicker, replace matched retainers and astragals, inspect sides and tops, never bypass sensors, and verify reverse after repairs.
Seasonal UV explains summer-to-fall crack discoveries. Wind-driven rain explains sudden wet floors. Uneven slabs explain daylight that survives cheap rubber.
Authority sources keep safety central while you chase comfort: CPSC for operator and photo-eye expectations, DASMA for system safety, SCE for outage timing context that might co-travel with odd electrical days.
Garage Door Repair Long Beach By On The Spot integrates these layers into diagnosis-first service from 151 E 5th St, Long Beach, CA 90802, with coastal-aware routing across Long Beach and nearby communities.
Your best homeowner tools remain daylight photos, flex tests, water logs, and a firm refusal to defeat sensors when a thick seal changes closing feel.
Dry floors, fewer pests, and safe closing are compatible goals when weather seals and safety systems stay honest—Long Beach sun included.
When the next heat wave hardens another generation of rubber, seasonal inspection habits keep you ahead of the first storm.
What to Prepare Before Your Weather Seal Service Visit
Clear a three-foot path inside and outside the threshold. Move bikes, bins, and chemicals that block retainer access.
Unlock gates and share codes. Note parking for the service vehicle on narrow Long Beach streets and alleys.
Gather opener brand photos, prior invoices, and any leftover seal scraps from DIY attempts.
List symptoms: daylight, drafts, pests, water dates, and whether the door reverses unexpectedly.
If an SCE outage happened the same week as opener oddities, note it—but keep seal photos ready because daylight gaps still need rubber.
Plan for the door to be open during service. Arrange pets securely away from the work zone.
Ask in advance whether sides and top should be approved for replacement in the same visit if they fail inspection.
Confirm who can authorize add-on retainer or threshold work if geometry demands it mid-visit.
HOA or rental managers should provide access letters when units are tenant-occupied.
A prepared site shortens time to a dry, safe, verified close cycle.
Call for Help If Your Garage Door Weather Seal Is Cracked or Brittle in Long Beach
If your garage door weather seal is cracked or brittle—especially when Long Beach UV, salt air, and hot concrete have hardened the rubber so drafts, bugs, or rain enter under the door—get diagnosis-first help from Garage Door Repair Long Beach By On The Spot. Matched bottom seals, side and top perimeter checks, floor-geometry judgment, and reverse verification keep weatherproofing and safety honest; bypasses, broken springs, off-track doors, and defeated safety loops should not wait.
Call (424) 310-0074, visit https://longbeachcagaragedoorrepair.com/, or find us at 151 E 5th St, Long Beach, CA 90802. Maps: https://www.google.com/maps?cid=5381478035707257267.
Bring daylight photos, flex-test notes, water-trail images, retainer close-ups, and any prior mismatched DIY seals. Ask for seal-versus-floor clarity, a demonstrated close cycle, a beam-break reverse check, and UV-aware materials so the gap does not return with the next heat wave.
Authority-aligned service keeps SCE outage context, CPSC operator safety (including photo-eye/entrapment expectations—critical when thicker seals tempt bypass), and DASMA system boundaries in view—so weather-seal repairs solve weather problems and larger door problems get named when they are the real cause.
Whether you are in a Belmont Shore west garage baking in evening sun, a Wrigley alley with a dipped slab, a Bixby home fighting corner pests, or a rental where someone unplugged the eyes after a thick DIY seal, cracked brittle weather-seal issues are solvable when daylight and hardness are named first and safety stays intact.
Garage Door Repair Long Beach By On The Spot — 151 E 5th St, Long Beach, CA 90802 — (424) 310-0074 — https://longbeachcagaragedoorrepair.com/ — Google Maps.
2 Responses