
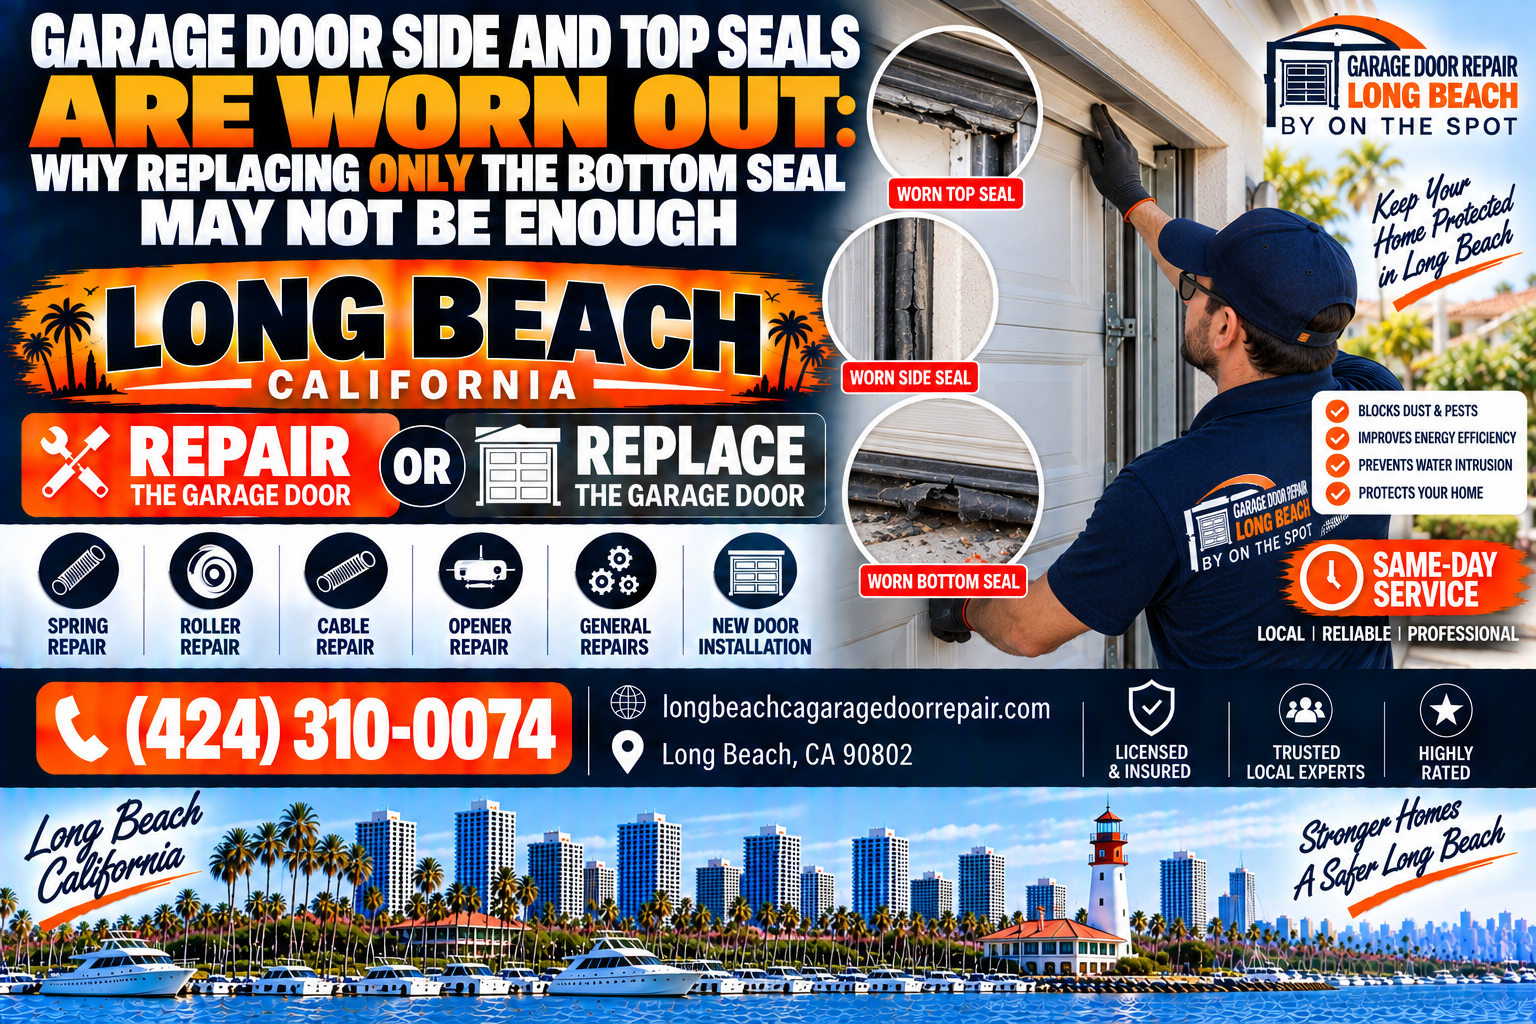
Long Beach Perimeter Seal Guide
Garage Door Side and Top Seals Are Worn Out: Why Replacing Only the Bottom Seal May Not Be Enough
When garage door side and top seals are worn out, replacing only the bottom seal may not stop drafts, bugs, or dust. Learn how jamb seals differ from header seals, why coastal Long Beach air ages vertical and top weatherstripping on its own timeline, when full perimeter sealing is needed, and how to separate alignment problems from seal wear.
Garage Door Repair Long Beach By On The Spot helps homeowners, renters, landlords, property managers, HOA communities, and small businesses restore full-perimeter weatherproofing with coastal-aware service across Long Beach, CA.
Bottom-Only Limits
Jamb vs Header
Alignment vs Wear
CPSC + DASMA + SCE
Serving Long Beach, CA
Table of Contents
Direct Answer: Why Replacing Only the Bottom Seal May Not Be Enough When Side and Top Seals Are Worn
Direct answer: Replacing only the bottom garage door seal may not be enough when side (jamb) and top (header) seals are worn, torn, curled, shortened, or missing, because wind-driven drafts, dust, salt mist, insects, and splash still enter along the vertical edges and the header gap even after the threshold looks tight. In Long Beach coastal air, UV and salt age vinyl stops and header weatherstripping on a different timeline than the bottom astragal, so a fresh bottom seal can look like a complete fix while daylight still shows at the jambs or a whistle remains at the top. Full perimeter sealing, or at least an honest inspection of bottom, sides, and top together, is needed when drafts persist after a bottom-only swap, when corner daylight remains, when dust lines reform on shelves, or when alignment issues leave uneven contact against tired stops. Alignment problems (warped panels, loose stops, off-plumb jambs, travel limits) can mimic seal wear and must be separated from material failure. Garage Door Repair Long Beach By On The Spot at 151 E 5th St, Long Beach, CA 90802 — (424) 310-0074.
Safe homeowner steps: with the door closed in daylight and again at night, look for light at the sides and header, not only under the door; feel jamb seals for stiffness or tears; note dust trails and pest activity at corners; photograph gaps; and avoid caulking the door shut or defeating sensors. Call a pro when stops are loose, the door rubs hard on one side, springs or cables look stressed, or bottom-only work already failed to stop drafts.
What Worn Side and Top Seals Really Mean on a Long Beach Garage Door
When homeowners say garage door side and top seals are worn out, they usually mean the vertical jamb weatherstripping and the header seal no longer make continuous, soft contact with the door face when the door is closed. The flaps may be torn, curled away from the panel, hardened by UV, nailed loosely, chewed by pests, or shrunk short of full height.
Side seals (often called door stops with weatherseal, vinyl stops, or brush seals) run up both jambs. Their job is to close the vertical air gap as panels sit flush against the stop face. Top seals close the horizontal gap at the header so wind, dust, and rain splash do not pour over the top section.
Worn perimeter seals fail differently from a cracked bottom astragal. Bottoms take tire abrasion and floor heat. Sides take scraping cycles, sun on the exposed flap, and fastener fatigue. Headers take sun, nesting debris, and occasional impact from ladders or stored items.
Long Beach coastal exposure matters: salt mist rides wind against west- and south-facing doors; UV embrittles vinyl flaps; marine-layer mornings leave damp films that dry into chalky surfaces. A bottom seal replaced last year can still look good while sides whistle every afternoon.
Not every side gap is dead rubber. Misaligned tracks, bowed panels, loose stop molding, and travel limits that leave the door shy of the jamb can open daylight even with new seals. Diagnosis separates seal wear from alignment.
This guide focuses on worn side and top seals and why bottom-only replacement often disappoints: how to recognize perimeter failure, when full sealing is needed, how jamb seals differ from header seals, and when Garage Door Repair Long Beach By On The Spot should take over.
Technicians treat corner daylight and mid-height whistle as perimeter evidence rather than assuming the new bottom seal was the wrong product.
Keep people and pets clear of the doorway while you inspect with the door fully closed for light checks and fully open for flap inspection.
Document photos of torn flaps, missing nails, and light lines for landlords, HOAs, and insurance notes after wind events.
A side seal can look attached for most of its length while failing at the bottom corners where drafts and pests prefer to travel.
Hard flaps that spring away from the panel when released have already lost the memory needed for weather contact.
If chalk dust transfers to your fingers after a gentle flex of a vinyl stop, UV aging is advanced enough to justify replacement planning.
Why Bottom-Only Seal Replacement Leaves Drafts, Bugs, and Dust
A brand-new bottom seal closes the threshold path. It does not close the vertical and header paths. Wind does not politely use only the floor gap. Coastal breezes press against the whole door face and find the weakest perimeter line.
Drafts at ankle height may improve after a bottom swap while chest-height and header drafts remain. Homeowners often feel disappointed because comfort and dust did not change as much as expected.
Bugs and spiders routinely use corner junctions where side seals meet the bottom seal. If sides are curled or short, pests walk around the fresh threshold rubber as if it were a speed bump.
Dust and fine coastal grit settle on shelves and hoods when side and top seals leak. Attached garages share that dust into living-space walls through pressure differences.
Splash and wind-driven rain can climb or blow past worn sides even when the floor looks dry. Water stains on the inside face of the bottom panel near the ends are a classic side-gap clue.
Bottom-only invoices that skip a perimeter inspection create repeat tickets. Honest shops inspect all three planes (floor, jambs, header) on every weather-seal visit.
If you already paid for a bottom seal and still see daylight at the sides, the next step is not another bottom profile; it is side and top evaluation plus alignment checks.
Photograph the closed door from inside with garage lights off at night. Side light columns and a bright header line prove the perimeter story faster than arguments about the new rubber under the door.
Pest trails that restart within days of a threshold-only job usually mean corner and jamb gaps remain open.
Energy and comfort complaints in attached Long Beach garages often track side whistle more than floor gaps once the bottom is already decent.
Salt-laden mist entering at the jambs corrodes tool chests and bike chains even when puddles never form on the slab.
A quiet new threshold with dusty shelves two days later is a perimeter leak signature, not a cleaning failure alone.
Jamb Seals vs Header Seal: Different Jobs on the Perimeter
Jamb seals are the vertical weatherstripping along left and right door stops. They brush or compress against the door face as the door closes into the opening. Failures include torn vinyl, missing fasteners, hardened flaps that stand away, brush bristles matted flat, and gaps that widen at mid-height where panels bow.
Header seals sit at the top of the opening. They close the gap above the top section. Failures include crushed foam, torn flaps, bird nesting damage, UV chalking on south headers, and stops that were never reset after a door replacement.
Water control priorities differ. Bottoms fight ponding and splash. Sides fight wind-driven rain and dust. Headers fight overtopping splash and attic-adjacent dust on windy days.
Replacement logistics differ. Side seals often nail or screw to wood or metal stops and may require resetting stop position for even contact. Header work may need ladder access, nesting cleanup, and careful clearance so the top section does not bind.
Materials differ: vinyl flap stops, foam-backed stops, brush seals, and combination designs. Coastal UV resistance and continuous contact matter more than color matching.
A quiet threshold with a screaming side whistle is a jamb problem. A tight perimeter with dust raining from above on windy days is often a header problem. Name the plane before buying parts.
Technicians measure stop thickness, flap condition, and contact pressure with the door closed before promising same-day perimeter completion.
Garage Door Repair Long Beach By On The Spot inventories common coastal stop and header profiles so many worn-side tickets finish without a second parts run.
Brush side seals help dust; vinyl flaps help air and light; headers often need a dedicated top seal rather than leftover bottom rubber cut short.
Never assume the header is fine because you cannot see it easily from the driveway; night light checks from inside reveal header gaps clearly.
Corner junctions where jamb meets header and jamb meets bottom are the highest-value inspection points on coastal doors.
Resetting stops without replacing shredded flaps recreates the same leak with nicer wood; replace tired weather faces when they fail the flex and light tests.
How Coastal Long Beach Air Ages Side and Top Seals Faster
Long Beach coastal air carries salt mist, UV, and wind that age side and top seals on a compressed timeline compared with many inland neighborhoods.
Ultraviolet light embrittles vinyl flaps until they curl away from the door face. Once curled, they no longer wipe cleanly and daylight appears even if fasteners remain.
Salt film settles on damp morning seals and later bakes in afternoon sun. Chloride plus heat encourages surface chalking and can speed corrosion of nails, screws, and metal stops that hold seals in place.
West-facing Belmont Shore and Naples doors often take evening sun full on the closed door face and exposed stop flaps. Alley doors that bake over light concrete see bounce heat. Covered north exposures age more slowly but still fail from cycle abrasion and age.
Wind pressure on storm days tests every weak fastener. Loose stops flutter and tear; once torn, they funnel grit into the contact line and accelerate further wear.
Marine-layer mornings add moisture; clear burn-off adds UV. That wet-dry-UV cycle is a known coastal wear pattern for door seals, patio furniture, and outdoor plastics alike.
On The Spot routes from 151 E 5th St, Long Beach, CA 90802 routinely see side seals that look older than their calendar years specifically because coastal UV and salt compressed useful life, while bottoms were replaced recently and looked fine.
Rinse salt film gently from stops after windy events without soaking openers or sensors, and never spray solvents that attack vinyl or rubber.
HOA complexes with shared western exposures often see clusters of side-seal tickets after the same hot summer: geometry and sun, not coincidence alone.
If flaps still look mostly intact but feel rock-hard and stand off the panel, UV embrittlement, not only visible tears, is already present and replacement timing has arrived.
Afternoon sea breezes push fine grit into open side gaps; that grit then abrades flaps on every cycle, turning a small leak into shredded vinyl.
South headers that bake in winter sun still UV-age foam top seals even when the garage feels cool inside.
When Full Perimeter Sealing Is Needed, Not Just a Bottom Swap
Schedule full perimeter sealing when side or top seals show tears, curl, missing fasteners, or daylight; when drafts or dust continue after a recent bottom-only replacement; when corner pest activity persists; when wind whistle is obvious at the jambs; or when a home sale, rental turnover, or insurance moisture claim needs documented weatherproofing.
Full perimeter does not always mean every piece must be brand new on the same hour. It means inspect all planes and replace what fails, then verify contact. A healthy year-old bottom can stay if sides and header are the real leakers.
Combined replacement in one visit is efficient when multiple planes are tired, when stops must be reset anyway, or when travel access and ladder time already justify completing the system.
Partial work is honest when only one plane fails and others pass flex, light, and fastener checks, documented with photos so expectations stay clear.
Alignment corrections belong in the same conversation. Resetting loose stops, correcting mild panel rub, and verifying close position may be required before new seals can succeed.
Do not wait for soaked drywall or established rodent nesting if daylight columns already show at night. Perimeter gaps are actionable early.
Attached-garage households that notice living-space drafts or dust should treat perimeter sealing as comfort and indoor-air related, not only a garage cosmetic.
Call (424) 310-0074 when prior bottom-only work disappointed or when night light checks show side or header gaps.
Property managers should budget perimeter inspections seasonally for coastal portfolios rather than reacting only after tenant draft complaints.
If someone already caulked the door to the jamb as a temporary measure, schedule professional removal and proper seals; caulk is not a door seal strategy.
Home sale inspections that note light at the sides are easier to resolve with full perimeter documentation than with another bottom-only receipt.
Storm-season calendars in Long Beach reward completing sides and header before the first atmospheric river pattern, not after wet boxes appear.
Alignment vs Seal Wear: Separating Geometry From Tired Rubber
Alignment problems mimic worn seals. If the door sits shy of one jamb, if a panel bows, if stops were installed out of plumb, or if travel limits leave the door short of the header, daylight appears even with flexible new weatherstripping.
Seal wear signs include chalky hard flaps, tears, missing chunks, fasteners pulled through aged vinyl, and brush bristles flattened permanently. Alignment signs include uneven gaps that change when you gently push the closed door, rub marks on one side only, and light that shifts after track or hinge adjustment.
Never force a close by maxing opener force to mash a door into misaligned stops. That risks entrapment protection problems and damages new seals quickly, contrary to safe automatic operator practice highlighted in CPSC consumer FAQs.
Technicians check track plumb, roller condition, hinge wear, spring balance, and stop position before blaming only the vinyl. DASMA system safety framing treats the door as a complete system: seals, tracks, springs, and operators interact.
Long Beach alley garages with settled slabs and older wood jambs show mixed cases often: tired seals plus stops that need resetting.
After seal replacement, cycle the door and look for continuous contact without scraping metal continuously on the stop face.
One-sided whistle with even-looking seals often points to alignment or stop position more than material age alone.
Photograph rub marks and light columns before service so the tech can compare geometry clues with material clues on arrival.
If the door is heavy, crooked, or drops hard when disconnected, address balance and spring safety before cosmetic perimeter work.
Bottom seal success with persistent side light is a classic mixed ticket; do not buy a third bottom profile hoping vertical gaps vanish.
A door that kisses one jamb hard and floats on the other will shred the tight-side seal early and leave the float-side forever drafty.
Travel limits set too shy of the header leave a permanent top gap no amount of new foam will hide forever; adjust geometry and seals together.
Field Inspection Flow: Worn Side and Top Seals to Perimeter Decision
Use this field flow when you suspect worn side and top seals, or when a bottom-only replacement failed to stop drafts. Keep people and pets clear of the doorway.
- Night light check: From inside with lights off, close the door and look for vertical light columns at the jambs and a bright line at the header, not only under the door.
- Day flex test: With the door open, gently flex side flaps and header seal. Hard chalky feel, curl, tears, or missing fasteners mean material failure.
- Corner map: Photograph bottom corners where side seals meet the threshold and top corners where jambs meet the header. These junctions drive pests and drafts.
- Bottom status: Note whether the bottom seal is new, cracked, or short. A new bottom does not clear the sides of blame.
- Alignment glance: Look for rub marks, uneven gaps, loose stops, and a door that sits shy of one jamb.
- Dust and pest history: Log shelf dust return time, insect trails, and draft complaints after the last bottom-only job if any.
- Safety glance: If springs look broken, cables frayed, or the door is crooked or heavy, stop DIY and call a pro first.
- SCE context: If odd opener behavior coincided with neighborhood power events, check the SCE Outage Center, then still address perimeter daylight if it remains.
- Call a pro: Share night photos, flap close-ups, and whether bottom-only work already happened. Ask for perimeter inspection, stop reset if needed, and reverse verification after any close-position changes.
This flow separates worn jamb and header seals from alignment, bottom-only myths, and power coincidences so the repair matches the cause.
Symptom Comparison Table: Side Seal vs Top Seal vs Bottom-Only vs Alignment
Use this table when side and top seals look worn, or when drafts remain after a bottom seal swap. Match clues before buying random vinyl online or defeating safety sensors.
| Clue | Likely Layer | Homeowner Safe Step | Pro Step |
|---|---|---|---|
| Daylight columns at jambs; bottom looks tight | Worn side seals | Night photo; schedule sides | Replace jamb seals; check stops |
| Bright header line at night | Worn or missing top seal | Photo from inside | Replace header seal; verify limits |
| New bottom; drafts and dust continue | Perimeter leak, not bottom | Stop rebuying bottoms | Full perimeter inspection |
| Torn/curled vinyl flaps; chalky feel | UV-aged side seals | Flex test photos | UV-aware stop replacement |
| Light gap changes when you push door | Alignment / stop position | Do not max force | Track/stop/balance diagnosis |
| Whistle at mid-height one side only | Bow, rub, or loose stop | Mark rub location | Geometry + seal plan |
| Pests at bottom corners nightly | Side-to-bottom junction gaps | Do not poison tracks | Corner seal + perimeter tune |
| Dust returns on shelves in days | Side/top air leak | Log return time | Jamb/header sealing |
| Door reverses after thick DIY side foam | Travel / sensor interaction | Do not bypass sensors | Remove unsafe foam; reset properly |
| Fails during SCE outage week too | Power co-factor possible | Check SCE outage center | Opener + perimeter full check |
| Sensors unplugged to force close past packing | Unsafe bypass present | Stop using defeated setup | Restore sensors; seal correctly |
| Water stains on panel ends, floor dry mid-span | Side wind-driven path | Storm photos | Side seals + grade notes |
Brief technicians with your matching rows. Keep CPSC and DASMA safety boundaries visible while you chase drafts and dust.
DIY-Friendly Perimeter Seal Tasks vs When to Call a Pro
DIY-friendly tasks include night light checks, photographing torn flaps and missing fasteners, gently cleaning dust from stop faces, noting whether a recent bottom-only job failed to stop drafts, and confirming opener safety sensors are not defeated.
Some experienced homeowners can replace nail-on vinyl stops if they match profile, keep the door secure, and avoid spring hardware. Mistakes include over-nailing, leaving waves that leak, installing stops that bind the door, and packing foam that trips sensors.
Call a pro for loose or rotten jambs, metal stop systems, header work needing ladder safety, doors that rub or sit crooked, broken springs, cable issues, commercial high-cycle doors, and any situation where close position must change.
Safety first: garage door springs and cables store dangerous energy. Perimeter seal work should never become an excuse to loosen spring hardware.
CPSC guidance on automatic residential garage door operators reminds homeowners that opener safety systems must remain functional after any door work, including stop resets that change closing resistance.
DASMA system safety tips frame the door as a complete system: seals, tracks, springs, and operators interact. New side seals on a poorly aligned door create rub and early tear-through.
If you already started a DIY side seal and the door binds, scrapes, or sensors trip, stop and call (424) 310-0074 rather than defeating sensors.
On The Spot prefers finishing partial DIY jobs safely over shaming; bring leftover stop material and photos so matching is faster.
Videos that skip night light checks and alignment are incomplete for Long Beach coastal perimeter leaks.
When in doubt, inspection-only DIY plus a pro install is cheaper than a scored door face from a binding stop.
Header DIY from unstable ladders under an open door is a hard no; schedule professional header sealing.
Caulking the door shut, stapling towels to the jamb, or stuffing pool noodles are not perimeter seals and can interfere with travel and sensors.
False Fixes That Waste Time When Side and Top Seals Are Worn
False fixes waste money and sometimes create danger. Stuffing foam pipe insulation, towels, or moving blankets against the jambs is not a seal replacement and can interfere with sensors and reverse behavior.
Caulking the door to the stop traps the door and damages finishes; never do that.
Ordering random online vinyl without measuring stop thickness and flap style leads to binding doors and repeat leaks.
Cranking opener force to mash a door into curled stops does not restore flap flexibility and can worsen impact risk, contrary to safe automatic operator practice in CPSC consumer FAQs.
Replacing the bottom seal again when night photos already show side light columns burns budget without solving the plane that leaks.
Spraying silicone endlessly on shredded flaps may quiet squeaks briefly but will not close tears or restore missing sections.
Bypassing photo eyes because DIY foam packing trips them is the most dangerous false fix; restore optics and install proper seals instead.
Waiting for one more windy season after daylight columns are visible often costs more in dust, pests, and moisture than a perimeter visit.
Painting cracked vinyl to hide chalking accelerates failure and prevents clean compression.
Shimming only the mid-stop while ignoring header and corners leaves the whistle paths that annoy households most.
Temporary duct tape on the exterior flap fails in coastal UV within days and leaves adhesive mess for the real install.
Blaming the opener circuit board for dust and drafts when light columns are obvious is a classic misroute; seal the perimeter first.
Red Flags: Stop DIY and Schedule Perimeter Seal Service
Stop DIY and schedule service when stops are rotten or pulling from the framing, the door binds hard after a DIY stop attempt, springs are broken, cables are frayed, the door is off-track, the door feels heavy or crooked, water or heavy dust is entering living space through an attached garage, or anyone suggests defeating sensors to close past foam packing.
Also stop if header work requires standing on unstable objects under an open door, if electrical smell appears at the opener, or if the door drops hard when disconnected.
Rental and HOA units should document night light photos before and after perimeter work for turnover files.
Call (424) 310-0074 for Garage Door Repair Long Beach By On The Spot when red flags appear.
Coastal worn side seals are common; unsafe improvisation is not acceptable.
If mold appears on drywall from repeated wind-driven moisture at the jambs, treat perimeter sealing as part of a moisture response, not a cosmetic afterthought.
Red flags override wait-until-weekend thinking, especially when bypass is already present.
Keep people and pets clear of the doorway while you wait for service.
A door that reversed into bunched foam packing and nearly struck a pet is out of service until verified.
Frayed lift cables spotted during a seal peek mean the seal appointment becomes a safety appointment first.
Professional Perimeter Sealing Path for Worn Side and Top Seals
A professional path typically includes interview for drafts, dust, pests, and prior bottom-only work; night or dark light inspection; flex and fastener checks on jambs and header; bottom seal status review; alignment and stop-position assessment; removal of failed weather faces; cleaning of stop surfaces; installation of matched side and top seals; stop reset when needed; corner detailing where planes meet; travel-limit verification if close position changed; and mandatory reverse and entrapment checks after work.
Technicians may recommend leaving a healthy bottom seal in place while replacing sides and header, or completing all three when multiple planes fail.
Wiring and sensor clearance are checked so foam packing leftovers and thick DIY materials are removed rather than worked around unsafely.
You should receive plain-language findings: UV-aged sides, missing header, alignment-dominant gap, bottom-only myth, or mixed.
Authority-aware shops keep CPSC reverse expectations and DASMA system framing in mind, and may note SCE outage coincidence when opener oddities traveled with draft complaints.
On The Spot path is diagnosis-first, safety-intact, and coastal-aware, not parts roulette from unmatched bags of vinyl.
Ask for before and after night light expectations and whether the bottom should stay, change, or wait.
Keep old defeated jumpers out of the garage; do not leave bypass hardware just in case packing made closing awkward.
Good techs show you the old flap flex test versus the new seal flexibility so the UV story is tangible.
Expect the visit to include clean stop faces; grit left under new flaps foreshadows early abrasion.
Side and Top Seal Materials: Vinyl Stops, Brush, Foam, and Coastal Choices
Common residential side seals include nail-on vinyl door stops with integrated flaps, screw-attached vinyl on metal stops, foam-backed stops, and brush seals for dust control.
Header seals include foam bulb or flap designs that compress against the top section, and some brush hybrids for dusty environments.
Vinyl flaps are common and effective when UV-aware compounds are chosen; cheap flaps chalk and curl early on Long Beach west exposures.
Brush seals shine for dust on sides; they may need pairing with a solid flap strategy when light sealing and wind control matter as much as dust.
Foam headers help close irregular top gaps but crush permanently if the door over-travels; limits must be honest after install.
Stop thickness and door face clearance must match. A fat stop on a tight opening binds; a skinny stop on a wide opening leaks.
Coastal-rated compounds and UV inhibitors are worth asking about. Leftover inland inventory without UV resistance recreates the curl problem early.
Color is mostly cosmetic; function is continuous contact without binding.
Ask your technician which profile they recommend for your night photos and why, not only what was on the truck.
Commercial high-cycle doors may need abrasion-rated brushes or heavier stops than residential soft vinyl; tell dispatch if the door is shared or high-use.
Corner transition pieces or careful overlapping cuts reduce the pest highway at jamb-to-threshold junctions.
Reusing ancient wood stops with new flaps can work if the wood is sound; rotten stops need replacement, not another row of nails.
Maintenance Habits That Extend Side and Top Seal Life in Long Beach
Dust stop faces regularly so grit does not grind flaps. Rinse salt film after windy coastal events without flooding the opener.
Avoid slamming the door into stops with maxed force settings. Teach household members not to lean bikes and ladders into header seals.
Inspect night light columns each season, especially before fall rain and after summer UV peaks, and anytime a bottom seal was recently replaced.
Do not paint the weather flaps. Paint cracks and accelerates failure. Keep overspray off seals when painting jambs.
Lubricate rollers and hinges per door care guidance, but keep petroleum products off vinyl and rubber seals unless the product is seal-safe.
Trim plants that hold moisture against side seals. Clear wasp or bird nesting from header weatherstripping carefully.
Test reverse monthly with a soft roll under the door path per common safety guidance, never with a person as the test object. After perimeter work, retest.
Battery backup openers still need honest seals and honest sensors. Power resilience does not equal weatherproofing.
Small habits prevent the every-wind-dusty-shelf cycle that Long Beach attached garages know too well.
Log the first side daylight sighting each year as a cue for a tune visit rather than waiting for pest establishment.
Replace Now vs Waiting When Side Seals Are Only Slightly Worn
Waiting is tempting when flaps show only early chalking and no rain is forecast. The risk is sudden tear-through on a windy night, pest entry during warm evenings, and dust that never stops returning to shelves.
Replace now when daylight columns are continuous, flaps are hard and curled, pests are established at corners, dust returns in days, or a bottom-only job already failed to fix comfort.
Waiting is more reasonable only when a same-week appointment is booked and interim risk is mild drafts, without sensor bypass and without packing foam against the door.
If last winter brought wind-driven damp at the jambs, schedule perimeter service before this winter first storm pattern.
Property sale and rental turnovers should not transfer known side light columns undocumented.
Cost of a proper perimeter visit is usually far below pest treatment, repeated dust cleaning labor, or moisture drywall repair.
Slight wear that coexists with loose stops means the stop conversation belongs in the same visit, not a delay.
Technicians treat early hard feel and corner light as actionable even before dramatic shredding appears.
Calendar reminders after peak summer UV catch many Long Beach side seals before the first autumn wind event.
If household members already argue about stuffing towels at the jambs, the social trigger for replace-now has fired.
Same-Day Help When Worn Side and Top Seals Let Drafts, Dust, or Pests In
Same-day help matters when pests are active at corners, when dust is affecting attached living space, when DIY foam jammed the door, when sensors were defeated to force a close, or when travel plans require a secure weatherproof garage.
Call (424) 310-0074 and mention worn side and top seals so dispatch can plan stop and header profiles.
Share night light photos, flap close-ups, and whether a bottom seal was recently replaced. Videos of whistle or rubbing help.
If the door is off-track or springs are broken, say so; those override a pure seal ticket for safety sequencing.
Garage Door Repair Long Beach By On The Spot routes from 151 E 5th St, Long Beach, CA 90802 across Long Beach neighborhoods and nearby communities.
Do not create a DIY bypass just for tonight. Park outside and wait for honest sensors and proper seals if needed.
Ask the arriving tech to verify reverse after any stop reset or close-position change; same-day speed should not skip safety checks.
Bring leftover mismatched vinyl from prior attempts so the correct profile is identified faster.
Mention attached-garage dust or drafts reaching living space so urgency is clear in dispatch notes.
Gate codes and alley access notes prevent wasted minutes while wind continues through worn jambs.
Questions to Ask Before Hiring for Side and Top Seal Replacement
- Will you inspect bottom, side, and top weatherstripping together, not only the plane I noticed?
- Do you match stop and header profiles on site, and what options exist when stops must be reset?
- Will travel limits and reverse/entrapment protection be tested after stop position changes?
- How do you distinguish seal wear from alignment, bowed panels, and loose jambs?
- What UV- and salt-aware materials do you recommend for Long Beach exposures?
- Can you leave a healthy bottom seal in place when sides and header are the real leaks?
- Do you refuse bypass requests if DIY foam packing interacted with photo eyes?
- Can you review SCE outage coincidence without ignoring obvious side light columns?
- What maintenance should I do between visits for stop cleaning and seasonal night checks?
- How should I document before/after night light photos for landlord, HOA, or insurance records?
Good answers sound specific. Vague we-will-put-some-vinyl-on replies without mentioning stops, alignment, and reverse tests are a yellow flag for this symptom pattern.
Why Garage Door Repair Long Beach By On The Spot for Worn Side and Top Seals?
Garage Door Repair Long Beach By On The Spot treats worn side and top seals as a coastal perimeter problem first: UV, salt, wind, stop condition, and alignment, while still checking bottoms, balance, and opener safety. We serve homeowners, renters (with permission), landlords, property managers, HOAs, and small businesses from 151 E 5th St, Long Beach, CA 90802.
We keep safety non-negotiable. CPSC and DASMA-aligned practice means we verify reverse after stop resets rather than defeating sensors when packing or binding changes closing feel. SCE outage context is used when timing suggests power co-factors, without ignoring daylight columns at the jambs in plain sight.
Coastal experience matters: west-sun curl, salt grit abrasion, alley jamb settlement, and bottom-only disappointment tickets show up on our Long Beach routes constantly.
Call (424) 310-0074, visit https://longbeachcagaragedoorrepair.com/, or map us at Google Maps.
Diagnosis First
Night light, flap flex, alignment, and bottom status before random vinyl swaps.
Safety Intact
No bypass. Limits and reverse verified after perimeter work.
Local Coastal Fit
UV, salt, and Long Beach stop realities built into profile choice.
Areas Served From the Long Beach Location
Garage Door Repair Long Beach By On The Spot serves Long Beach neighborhoods and nearby communities from 151 E 5th St, Long Beach, CA 90802, including downtown Long Beach, Belmont Shore, Belmont Heights, Naples, Alamitos Beach, Bixby Knolls, California Heights, Wrigley, Traffic Circle, El Dorado Park area, Lakewood borders, Signal Hill, and adjacent Los Angeles County pockets along regular routes. Worn side and top seal tickets appear often on west- and south-facing doors, sun-baked alley jambs, and attached garages after windy dust events.
Call (424) 310-0074 with gate codes, night light photos, flap close-ups, and whether a bottom-only job already happened. Website: https://longbeachcagaragedoorrepair.com/. Maps: https://www.google.com/maps?cid=5381478035707257267.
Provide reserved stall notes and whether a prior technician defeated sensors after foam packing. Condo P-levels may need escort. Rental turnovers should include a night light check and reverse demonstration before new occupants arrive.
Google Map Location
Find Garage Door Repair Long Beach By On The Spot at 151 E 5th St, Long Beach, CA 90802. Use this Google Maps link for directions and business details: https://www.google.com/maps?cid=5381478035707257267.
Phone (424) 310-0074 before visiting if you need to discuss worn side and top seals leaving drafts or dust in the garage. Most stop matching and alignment decisions are diagnosed at your garage rather than at a counter drop-off.
Bring night light photos, flap close-ups, stop thickness notes, and any prior mismatched DIY vinyl to any conversation: phone, web contact, or on-site.
FAQs About Worn Garage Door Side and Top Seals
These answers target common Long Beach questions when garage door side and top seals are worn out. Use them with the comparison table, not as a substitute for on-site help when red flags appear.
Why is replacing only the bottom seal sometimes not enough?
Because side and top seals close different paths. Wind, dust, pests, and splash still enter at jambs and the header when those seals are worn.
How do I know if my side seals are worn?
Look for torn or curled flaps, missing fasteners, chalky hardness, and vertical daylight columns at night with the door closed.
What is the difference between jamb seals and header seals?
Jamb seals run vertically along the stops; header seals close the top gap. Both matter for full perimeter weatherproofing.
Can alignment look like worn seals?
Yes. Off-plumb stops, bowed panels, and shy travel limits create gaps even with flexible new weatherstripping. Pros separate geometry from material wear.
Do Long Beach coastal conditions age side seals faster?
Often yes. UV, salt mist, and wind grit embrittle and abrade vinyl flaps faster than many inland climates.
Should I replace sides if my bottom seal is new?
Inspect sides and top anyway. Many homes need perimeter work after a bottom-only job that left drafts and dust unchanged.
Is DIY side seal replacement safe?
Light inspection and cleaning are DIY-friendly. Binding risk, header ladder work, alignment, and spring-adjacent issues are better as pro jobs.
My DIY foam packing made the door reverse. What now?
Do not bypass sensors. Remove unsafe packing and call for proper seals plus reverse verification.
Could an SCE outage relate to door quirks while seals are worn?
Outages can affect opener behavior. Check the SCE Outage Center, then still seal daylight columns if they remain.
Will new side seals fix pest problems?
They close major corner and jamb entry paths. Combine with sanitation and sealing other openings for best results.
How often should I inspect side and top seals?
Seasonally at minimum, after peak summer UV, before storm season, and anytime a bottom seal was replaced or dust returns quickly.
When should I call On The Spot?
Call when side or top seals are worn, night light shows gaps, bottom-only work disappointed, or DIY attempts bind the door. (424) 310-0074.
Quick AEO Summary: Worn Garage Door Side and Top Seals
What happens? Worn side and top garage door seals stop sealing the jambs and header, leaving drafts, dust, pest paths, and splash routes even when the bottom seal looks fine.
Why Long Beach? Coastal UV, salt mist, and wind grit age vinyl stops and headers while bottom-only replacements leave vertical and top gaps open.
What to do? Night-check light columns, flex-test flaps, separate alignment from wear, never bypass sensors for foam packing, and schedule perimeter sealing with reverse verification.
Who helps? Garage Door Repair Long Beach By On The Spot — 151 E 5th St, Long Beach, CA 90802 — (424) 310-0074.
Practical Long Beach Scenarios for Worn Side and Top Seals
Belmont Shore west garage: evening sun curled the vinyl flaps; bottom seal was replaced last spring; dusty cars and ankle-to-chest drafts remain. Night photos show bright jamb columns. Fix: UV-aware side seals plus header check, leave healthy bottom, verify reverse.
Wrigley alley: settled jamb on one side; new bottom did nothing for whistle. Light gap changes when the door is nudged. Fix: alignment and stop reset first, then new weather faces so seals are not shredded on day one.
Bixby Knolls family door: high cycles flattened brush seals; spiders at both bottom corners despite fresh astragal. Fix: corner-focused side replacement and junction detailing.
Downtown attached garage: living-space dust complaints; header foam crushed; bottom looked perfect. Fix: header seal and limit verification so the top section compresses without over-travel crush.
HOA rental turnover: previous tenant duct-taped the exterior flaps; tape failed in a week. Fix: remove residue, replace sides, document night light for file, demonstrate reverse for manager.
Signal Hill adjacent: wind-driven damp stains on panel ends after storms; mid-slab dry. Fix: side seals and splash notes rather than another taller bottom bulb.
Lakewood border: DIY foam noodles behind stops tripped photo eyes; someone unplugged a sensor. Fix: restore sensors, remove noodles, install proper seals, CPSC-aligned reverse test.
Naples coastal: salt grit abraded flaps to lace; bottom still soft. Fix: coastal-rated side materials and rinse guidance for the household.
California Heights: south header nesting crushed the top seal; sides fair. Fix: nest cleanup, header seal, light recheck; sides monitored.
El Dorado area open sky: chalky hard flaps that stand off; mild drafts now, storm season coming. Fix: replace now before first atmospheric river rather than wait for wet insulation.
Myths About Garage Door Side and Top Seals
Myth: If the bottom seal is new, the garage is weatherproof. Reality: sides and header are separate planes; wind uses every gap.
Myth: More opener force seals a whistling jamb. Reality: force increases risk and does not restore curled flaps; it can violate safe operator practice.
Myth: Any vinyl from a big-box aisle fits every stop. Reality: thickness, flap style, and fastener pattern must match or the door binds or leaks.
Myth: Brush seals alone always beat vinyl flaps. Reality: brushes help dust; wind and light often need a solid weather face or combination strategy.
Myth: Painting chalky flaps restores them. Reality: paint accelerates cracking and ruins compression.
Myth: Caulk is a permanent side seal. Reality: caulk traps the door and fails as a moving-seal strategy.
Myth: Header seals do not matter in Long Beach. Reality: wind and dust over the top are common on storm and Santa Ana-adjacent wind days.
Myth: Sensor bypass is fine until the new seals arrive. Reality: bypass is unsafe; park outside rather than defeat entrapment protection.
Myth: One side seal failure means both sides must wait years. Reality: inspect both; UV often ages the sun-exposed side first, but both deserve a light check.
Myth: Alignment issues are rare. Reality: alley settlement and older jambs make mixed geometry-plus-wear tickets common on Long Beach routes.
Deep Dive: Why the Garage Door Perimeter Is a Three-Plane System
Think of the closed garage door as a weather envelope with three primary planes: the threshold where the bottom seal meets the slab, the vertical jambs where side seals meet the door face, and the header where the top seal meets the top section. Air, dust, insects, and wind-driven moisture move like fluids; they exploit the weakest plane, not the newest receipt.
Bottom-only culture grew because bottoms fail visibly and flood dramatically. Side and top failures are quieter: whistle, dust, corner pests, and living-space drafts. Quiet does not mean trivial, especially in attached Long Beach garages that share walls and pressure with conditioned rooms.
Pressure differences matter. Afternoon sea breezes and evening cool-downs push and pull air through jamb gaps. A perfect bottom seal cannot stop that exchange.
Corners are multipliers. Where planes meet, small defects stack. A slightly short bottom plus a curled side flap equals a pest highway even when each defect looks minor alone.
Replacement sequencing should follow evidence. If night light is all jambs, prioritize sides. If the header glows, prioritize top. If the floor still shows mid-span light, include bottom. Mixed tickets deserve mixed work in one visit when practical.
Documentation protects everyone. Photos of each plane before and after prevent the argument that a bottom swap should have cured a header leak.
Energy narratives sometimes overpromise. Seals help comfort and dust control; they are not a substitute for wall insulation upgrades. Still, closing obvious daylight is one of the highest-ROI door comfort moves available.
Coastal salt mist makes the vertical planes more important than inland homeowners expect. Mist rides wind at mid-height as much as it puddles at the slab.
Technicians who sell only bottoms on every ticket create repeat calls. Technicians who sell all three without inspection waste money. Evidence-led perimeter thinking is the middle path On The Spot aims for.
Deep Dive: Jamb Seal Anatomy, Fasteners, and Failure Modes
A typical residential jamb seal is a vinyl or composite stop with an integral flexible flap, or a wood/metal stop with an applied weather face. The flap must remain soft enough to conform and tall enough to bridge the designed clearance.
Fasteners matter. Nails that pull through aged vinyl leave waves. Screws in metal stops that loosen under vibration open intermittent gaps that whistle only on windy days, confusing intermittent diagnosis.
Failure modes include UV curl (flap bends away), tear-through at fastener holes, abrasion lace from grit, pest chew at bottom corners, heat set where a flap cooked against a hot panel, and compression set where foam no longer springs back.
Installation quality shows later. Over-driven fasteners pinch flaps. Under-driven fasteners flutter. Uneven spacing creates scalloped contact lines that leak between fasteners.
Brush systems fail when bristles mat flat, shed, or get packed with grease and grit until they stop wiping. Cleaning helps briefly; matted brushes usually need replacement.
Measuring for replacement means noting stop width, flap projection, fastener type, and whether the stop itself is sound. Photos of the end profile help dispatch.
Left and right sides can age differently. West-sun sides often fail first. Still inspect both; wind does not respect the sunnier receipt date.
Binding after install usually means the stop sits too far into the opening or the door is already aligned tight. Back the stop out rather than raising force.
Corner finishing is craft. A beautiful mid-span flap with a raw bottom end invites the exact pests homeowners hate.
Deep Dive: Header Seals, Nesting, and Top-Gap Geometry
Header seals close the last horizontal line of the envelope. They are easy to ignore because driveway views rarely show them, yet night checks from inside make header gaps obvious as a bright horizontal band.
Common header materials include foam bulbs, vinyl flaps, and brush strips. Foam is forgiving of minor irregularities but can crush if the door over-travels into the header. Vinyl flaps need correct projection. Brushes help dust but may need a solid companion strategy for light sealing.
Bird and insect nesting under or against header seals is common on Long Beach routes. Nesting compresses foam, holds moisture, and can damage flaps. Safe nest removal and seal replacement belong together when damage is present.
South- and west-facing headers take UV that chalks foam skins and hardens flaps. Covered headers last longer but still age.
Geometry matters. If travel limits stop the door short, a gap remains regardless of seal quality. If limits drive the door too far, seals crush and the opener strains. Limit verification is part of header work, not an optional extra.
Ladder safety is non-negotiable. Header DIY from unstable platforms under a live door is a frequent injury pattern; hire it out when access is awkward.
After header replacement, cycle the door and watch for rub on the top section corners and for remaining light at night.
Dust that appears to rain from above on windy days is a header clue even when sides look fair.
Some doors use a top weather seal on the door itself rather than only on the header stop; identify which system you have before ordering parts.
Deep Dive: Alignment Clues That Mimic Worn Side Seals
Alignment mimics seal wear when gaps are geometric rather than material. The door may be tipped, a panel may bow, a track may be out of plumb, hinges may be worn, or stops may have been installed off the intended line.
Field clues: light gaps that change when you push the closed door; rub polish on one stile; uneven reveal along the jamb; a door that seals tight at the bottom corner and floats at mid-height on the same side.
Material clues: chalk, curl, tears, missing fasteners, flattened brushes. When material looks healthy but light remains, think geometry first.
Mixed tickets are common. A door can have both curled vinyl and a loose stop. Replacing vinyl without resetting the stop recreates early failure.
Never use opener force as alignment. Max force to mash a tipped door into stops risks entrapment performance and damages new seals. CPSC consumer guidance emphasizes maintaining automatic operator safety systems; defeating that pathway for convenience is unsafe.
DASMA system framing reminds techs that tracks, springs, and seals interact. A balance problem that lifts one side unevenly will always look like a side seal complaint until balance is corrected.
Long Beach alley slabs and older wood openings contribute to off-square conditions. Expect more mixed diagnoses near older housing stock.
Measurement helps: consistent feeler-gauge style checks along the jamb (even with simple paper tests) show whether the gap is uniform wear or tapered geometry.
After geometry correction, new seals last longer because they are not asked to bridge impossible gaps.
Deep Dive: Insects, Rodents, Dust, and Corner Gaps at Worn Sides
Corner gaps at the junction of side seals and bottom seals are premium real estate for spiders, ants, and opportunistic rodents seeking shelter. A new bottom seal that does not meet a healthy side flap still leaves a corner tunnel.
Dust follows air. Fine coastal grit rides through mid-height jamb gaps and settles on horizontal surfaces. Households that clean constantly yet see dust return in days often have active air exchange through the perimeter.
Poison in tracks is a bad idea. It contaminates rollers and does nothing to close the gap. Seal the path; then sanitize.
Night light columns correlate strongly with pest highways. If you can see light, pests can use the path.
Attached garages share air with living space under some conditions. Dust and allergen concerns make perimeter sealing a comfort and indoor-air topic, not only a garage neatness topic.
Bird nesting at headers adds droppings and debris that worsen dust and can damage seals further.
After perimeter sealing, expect pest activity to drop at the door line; remaining activity may come from other openings (vents, man door, weep holes) that still need attention.
Photograph pest trails at corners before service for landlord and HOA documentation.
Do not stuff steel wool into moving door gaps as a permanent strategy; it can interfere with travel and sensors. Proper seals are the durable fix.
Deep Dive: Opener Safety When Stop Packing and Seal Changes Alter Closing Feel
Any change that increases closing resistance or narrows the opening can interact with photo eyes, force settings, and reverse performance. DIY foam packing along jambs is a frequent trigger for nuisance reverses and, worse, bypass temptation.
CPSC guidance on automatic residential garage door operators exists to protect people from entrapment hazards. Consumers should never defeat photo eyes or reverse features to make a door close past packing or binding seals.
Correct sequence: remove unsafe packing, install proper seals, reset stops if needed, adjust travel limits honestly, verify force within safe norms, test reverse with an appropriate non-human obstacle method, and confirm photo eyes align and function.
DASMA system safety tips reinforce that the door is a system. Seals that bind because alignment is wrong are a system problem, not a reason to raise force until the motor smells hot.
SCE outage context still matters when openers behave oddly after power events, but outages do not create jamb light columns. Check SCE Outage Center for timing, then finish the seal diagnosis.
Battery backup units must also reverse correctly; backup power is not permission to run a defeated safety loop.
Teach household members that a door which only closes when someone holds a sensor out of the way is unsafe and out of service.
After perimeter work, ask the tech to demonstrate reverse and photo-eye function before they leave.
Keep children and pets away during testing. Never use a person as the obstruction test object.
Deep Dive: UV Curl, Salt Grit, and Why Coastal Sides Fail on Their Own Timeline
Bottom seals and side seals share UV and salt exposure but not the same mechanical life. Bottoms abrade on concrete and cook on hot slabs. Sides scuff on every cycle, flex at fastener lines, and present flap faces to sun and wind grit at mid-height.
UV curl is the signature coastal side failure: the flap loses plasticizer, chalks, and bends away from the door until daylight appears despite intact fasteners.
Salt grit acts like sandpaper. Onshore breeze deposits particles into the contact line; each open/close cycle abrades. West exposures near the water see this faster.
Timelines diverge. A household may rightly replace a brittle bottom at year seven while sides fail at year five, or the reverse. Calendar coincidence is not required.
That divergence is exactly why bottom-only habits disappoint. The receipt date on the astragal does not immunize the jambs.
Material choice shifts the curve. UV-aware vinyl and quality brushes last longer; bargain flaps recreate callbacks.
Maintenance shifts the curve slightly: rinsing salt film, dusting stops, avoiding paint overspray. Maintenance does not resurrect already curled flaps.
Neighborhood clusters after hot summers are real. Shared orientation means shared UV dose.
Technicians should explain timeline divergence in plain language so customers do not feel upsold when sides are recommended after a recent bottom job.
EEAT, AEO, and GEO Notes for This Long Beach Side and Top Seal Guide
Experience: Garage Door Repair Long Beach By On The Spot sees worn side and top seals constantly on coastal routes, including bottom-only disappointment tickets, UV curl on west flaps, alley alignment mixes, and unsafe foam packing bypass attempts.
Expertise: This guide separates jamb seals from header seals, material wear from alignment, and perimeter planes from opener electronics, with safety checks aligned to public CPSC and DASMA consumer guidance and SCE outage timing context.
Authoritativeness: We cite SCE Outage Center, CPSC automatic residential garage door operator FAQs, and DASMA garage door system safety tips as consumer authorities while emphasizing on-site diagnosis.
Trust: Clear NAP, phone, maps CID, refusal to endorse sensor bypass, and honest partial-versus-full perimeter recommendations build trust over parts roulette.
AEO: Direct answer and quick summary sections state why bottom-only may not be enough, what to inspect, and when to call, in answer-ready language.
GEO: Long Beach neighborhood scenarios (Belmont Shore, Wrigley, Bixby, Naples, Signal Hill adjacent, downtown attached garages) ground the advice in local coastal conditions.
Semantic SEO: Entities covered include jamb seals, header seals, door stops, bottom astragals, UV curl, salt grit, alignment, photo eyes, reverse testing, and full perimeter sealing.
Originality: This article focuses on side and top wear and bottom-only limits rather than copying cracked-bottom-seal or sensor-sunlight guides.
Homeowners should use this as preparation for a skilled visit, not as permission to defeat safety systems.
For service, call (424) 310-0074 or visit the site with night light photos ready.
Putting It Together: Worn Side and Top Seals as a Perimeter Problem
Worn side and top seals are a perimeter problem. A beautiful new bottom seal can still leave drafts, dust, pests, and splash paths open along the jambs and header.
Long Beach coastal air accelerates UV curl and salt grit abrasion on vertical and top weather faces, often on a different clock than the threshold.
Full perimeter sealing, or evidence-led replacement of the failed planes, beats bottom-only habits when night light columns remain.
Alignment must be separated from material wear so new flaps are not asked to bridge impossible gaps or bind the door.
Safety stays non-negotiable: no sensor bypass, reverse verification after stop changes, and system thinking per CPSC and DASMA consumer guidance, with SCE outage notes when timing fits.
Garage Door Repair Long Beach By On The Spot at 151 E 5th St, Long Beach, CA 90802 helps homeowners, renters, landlords, managers, HOAs, and small businesses finish the envelope correctly.
Bring night photos, flap close-ups, bottom status notes, and any DIY packing history to the visit.
Judge success by dark jambs and header at night, quieter wind response, slower dust return, and a demonstrated safe reverse, not by the thickness of a single threshold receipt.
If prior bottom-only work disappointed, you are not imagining it; the other planes were likely already failing.
Act before storm season and before pests claim the corners; early perimeter work is calmer than emergency moisture tickets.
What to Prepare Before Your Side and Top Seal Service Visit
Clear access to both jambs and the header area; move bikes, ladders, and storage that block stop work.
Collect night light photos, daytime flap flex photos, and any prior bottom-seal invoices or leftover vinyl.
Note draft, dust, and pest timelines, especially whether problems continued after a bottom-only replacement.
List gate codes, parking instructions, HOA rules, and whether children or pets will be present.
Mention if sensors were ever unplugged or if foam packing is still in place so the tech arrives ready to remediate safely.
If the door is heavy, crooked, or noisy, say so; safety sequencing may come before seal cosmetics.
Prepare questions from the hiring list: perimeter inspection, UV materials, reverse demonstration, and whether a healthy bottom can stay.
For rentals and sales, request before/after documentation of night light.
Unlock the man door so the tech can work with the garage secured without relying only on opener travel.
Have payment and authorization ready for property managers who must approve stop replacement beyond a simple flap swap.
If an SCE outage occurred the same week as opener oddities, note the timing for the visit record while still expecting seal evidence to be addressed.
A prepared site turns a perimeter visit into a clean, safe, one-trip success more often than a cluttered surprise garage.
Call for Help If Garage Door Side and Top Seals Are Worn Out in Long Beach
If your garage door side and top seals are worn out — especially when Long Beach UV, salt air, and wind grit have curled the flaps so drafts, dust, or pests still enter after a bottom-only seal swap — get diagnosis-first help from Garage Door Repair Long Beach By On The Spot. Matched jamb and header seals, alignment checks, honest perimeter inspection, and reverse verification keep weatherproofing and safety intact; bypasses, broken springs, off-track doors, and defeated safety loops should not wait.
Call (424) 310-0074, visit https://longbeachcagaragedoorrepair.com/, or find us at 151 E 5th St, Long Beach, CA 90802. Maps: https://www.google.com/maps?cid=5381478035707257267.
Bring night light photos, flap flex notes, bottom-seal status, stop close-ups, and any prior foam packing or mismatched DIY vinyl. Ask for side-versus-alignment clarity, a demonstrated close cycle, a beam-break reverse check, and UV-aware materials so the jamb gaps do not return with the next heat wave.
Authority-aligned service keeps SCE outage context, CPSC operator safety (including photo-eye/entrapment expectations — critical when packing tempts bypass), and DASMA system boundaries in view — so perimeter seal repairs solve perimeter problems and larger door problems get named when they are the real cause.
Whether you are in a Belmont Shore west garage with curled flaps, a Wrigley alley with mixed alignment, a Bixby home fighting corner pests after a new bottom seal, or a rental where someone unplugged the eyes after foam packing, worn side and top seal issues are solvable when daylight columns are named first and safety stays intact.
Garage Door Repair Long Beach By On The Spot — 151 E 5th St, Long Beach, CA 90802 — (424) 310-0074 — https://longbeachcagaragedoorrepair.com/ — Google Maps.